Mobile Application - iOS
Installation
Installation from App Store or via TestFlight
The application is currently available only via TestFlight.Registration as a tester is needed.
Compiling from source code
The source code and the directory structure are compatible and meet the requirements for the xcode in which it was created.
Minimum requirements
- iOS 13 compatible iPhone or iPad or newer (iPhone 6S/SE or newer)
User Guide
Application Start and Permissions
The application can be run by selecting it in the list of applications.
- Make sure to grant permissions to access the device’s location and take pictures:
- Access device’s location
-
Allow to add location data to token photos
-
Receiving different types of location data
-
Recording paths
- Take pictures and record video
- Allow to take photos by camera.
To log in to the application, connection to the internet is required. After the first login, the user will be remembered. A new login will only be required after explicit logout.
Login
After the first launch of the application and granting all the necessary permissions to the application, the user will be presented with a login screen (Fig. 19), where the assigned login and password will need to be filled out. Click the Sign In button to complete the login.
To successfully log in, all data most be entered correctly and the device should be connected to the Internet at the time of login. The login details will be remembered for future uses of the app. Re-login will be required only after explicit logout of the user.

Fig. 20 Login screen
Through the "Select Server" button, it will be possible to set the URL of a custom server that will be used instead of the app's default server. Once you have logged in, in order to return to the default server, you will need to perform a logout and deselect the custom server.

Fig. 21 Select Server
Main Screen
The attributes of the host device are displayed in the “Basic Info” section. Traffic lights are displayed next to some of the attributes. Their detailed description is given below.
- Location service check
-
The green color indicates the active ability of the phone to determine its current location.
-
Red means an inability to determine your current position. If this is the case, location services on the device may be disabled.
Other attributes use the green or yellow color.
Green indicates that the device has that particular property. Yellow indicates that the device does not have the given property or has not yet been able to verify the given availability and may change to green over time.
- Galileo capability
- Checks if the device is capable to read Galileo signals
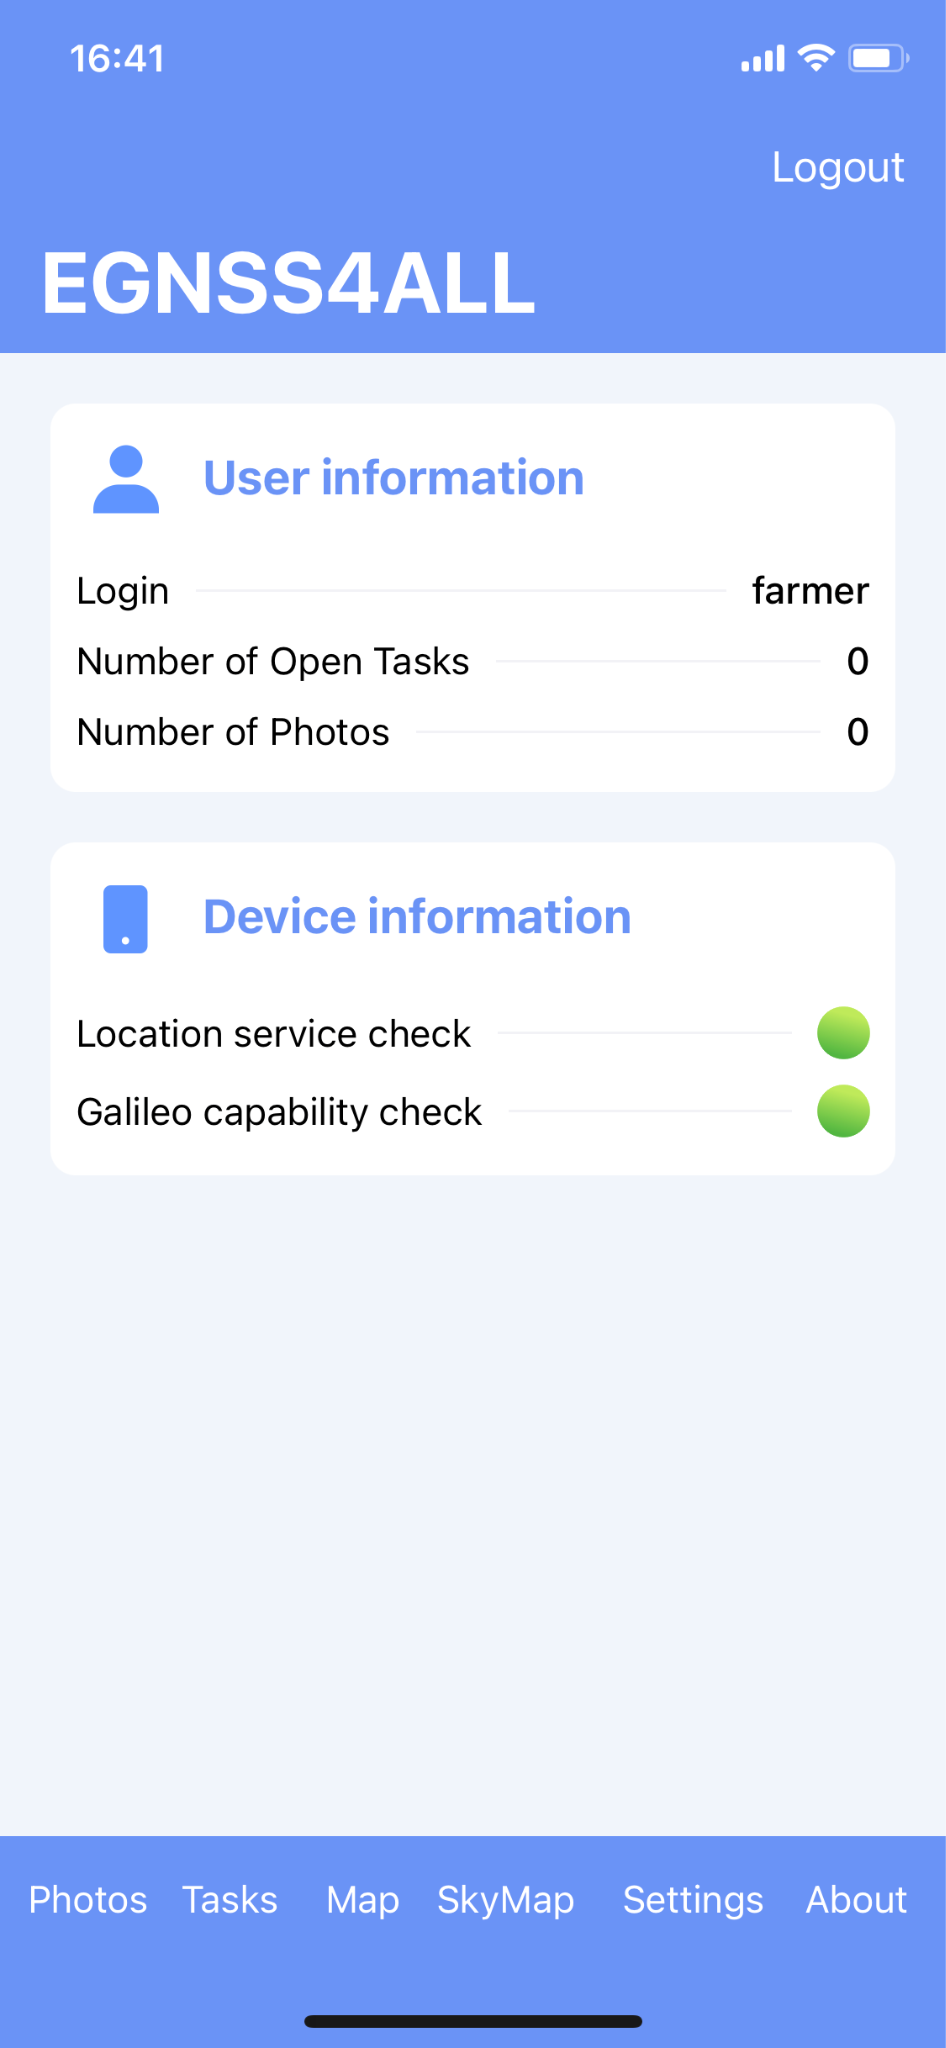
Fig. 22 Main screen
The application modules can be accessed through by pressing buttons which are situated in the bottom of the screen. The following options are available:
- Photos
- Open screen with list of unowned photos.
- Tasks
- Open screen with task list.
- Map
- Open screen with map including all captured photos, recording new paths or viewing already recorded paths.
- Settings
- Open screen with settings.
- About
- Open screen with basic information about application
Task List
In the task overview (Fig. 21), user tasks are listed by name, status, number of captured images, creation date and due date. By clicking on a specific task, a screen with details and options to edit is displayed.
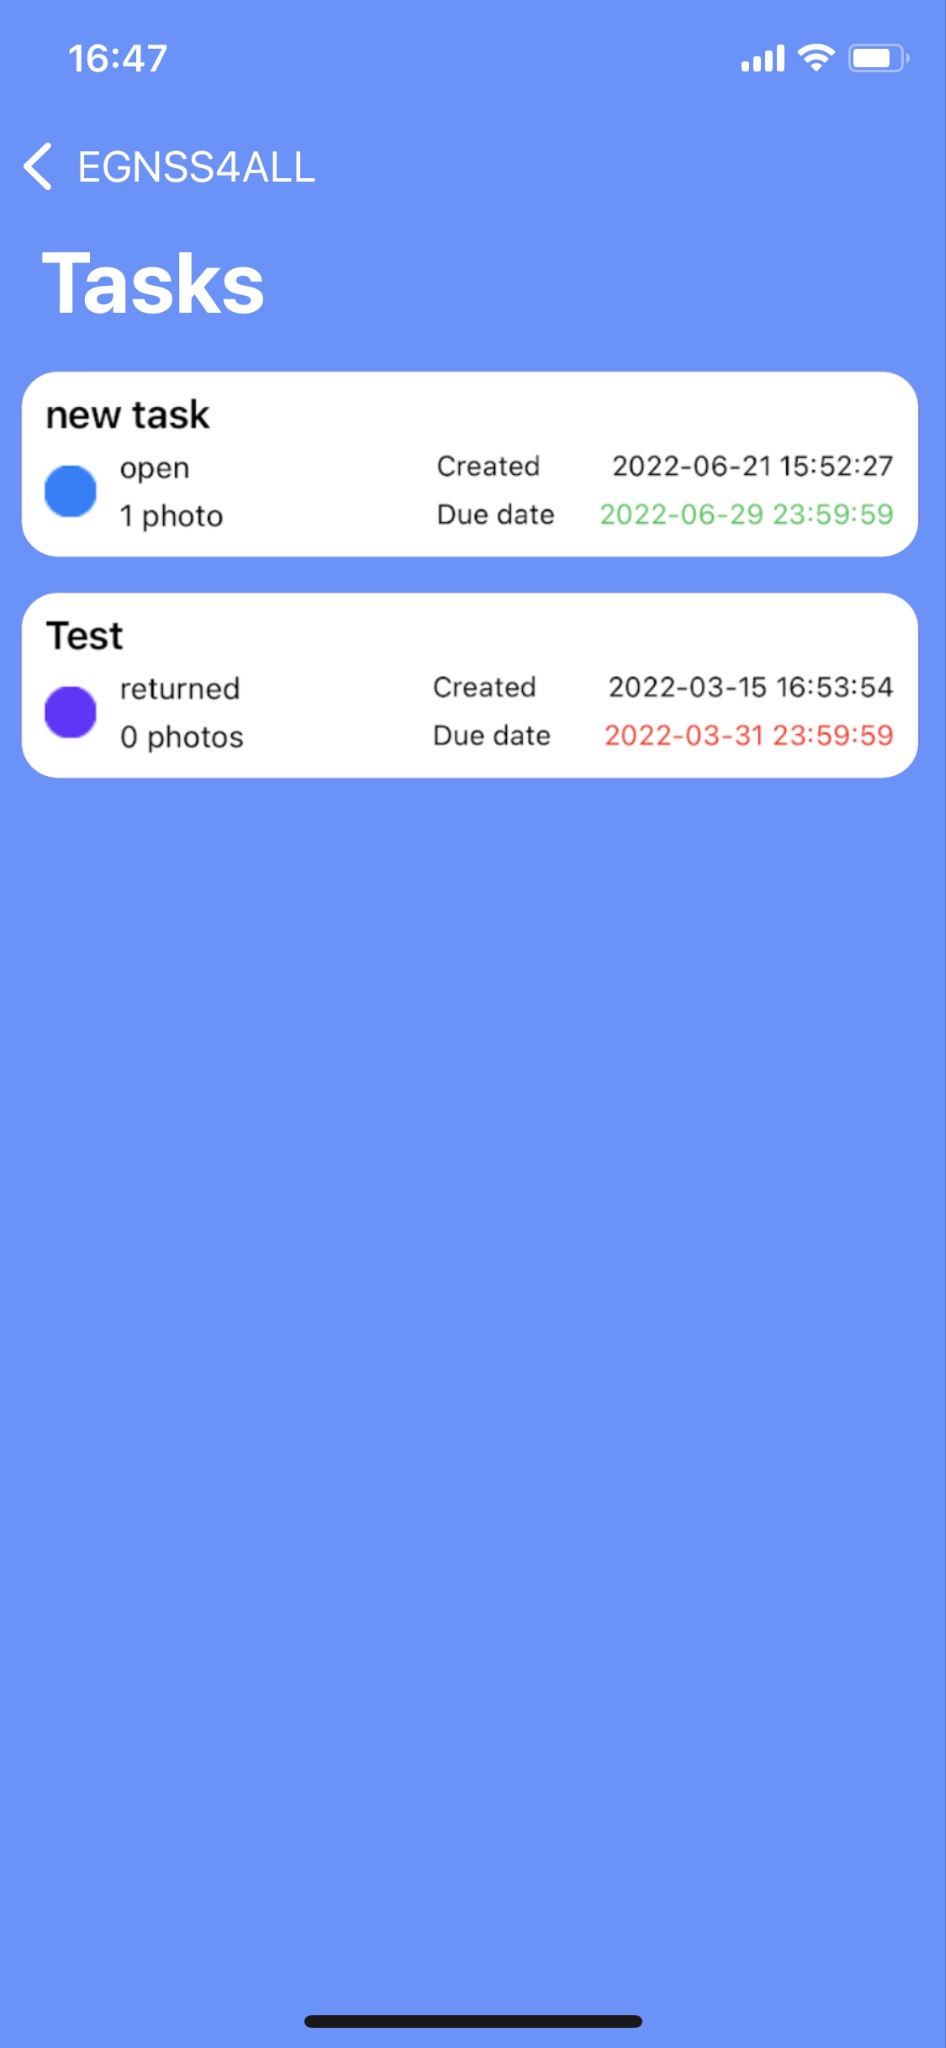
Fig. 23 Task list
Tasks can be set in following states, which also determine their editability:
Description |
Editable |
|
|
New |
YES |
|
Open A new task, which has been already displayed by the user. The user is aware of the task. |
YES |
|
Returned |
YES |
|
Data provided The task which was completed and sent by the user to the PA |
NO |
Task detail
The task detail (Fig. 22) shows the data attributes of the task, including all captured images. Depending on the status of the task, the task can either be edited or viewed.
-
The upper section lists the basic data attributes of the task.
-
The Instructions section shows the description needed to complete the task given by an authorized staff member of the Paying Agency.
-
The Reason for return section describes the reason for the Paying Agency why the task was returned for a new performance.
-
The Note section is completed by the user as part of completing the task before it is submitted.
-
The photo section shows thumbnails of photos taken. The user takes photos by clicking the
 , which enters the camera mode for
shooting (Camera Mode). Tap to delete the currently displayed
, which enters the camera mode for
shooting (Camera Mode). Tap to delete the currently displayed
 .
. -
Use the buttons Previous and Next to move between photo previews.
A photo cannot be deleted if it has been already sent to the server, even if the task is in an editable state.
Click the SEND button to send the message. After successful submission, the task can no longer be edited.
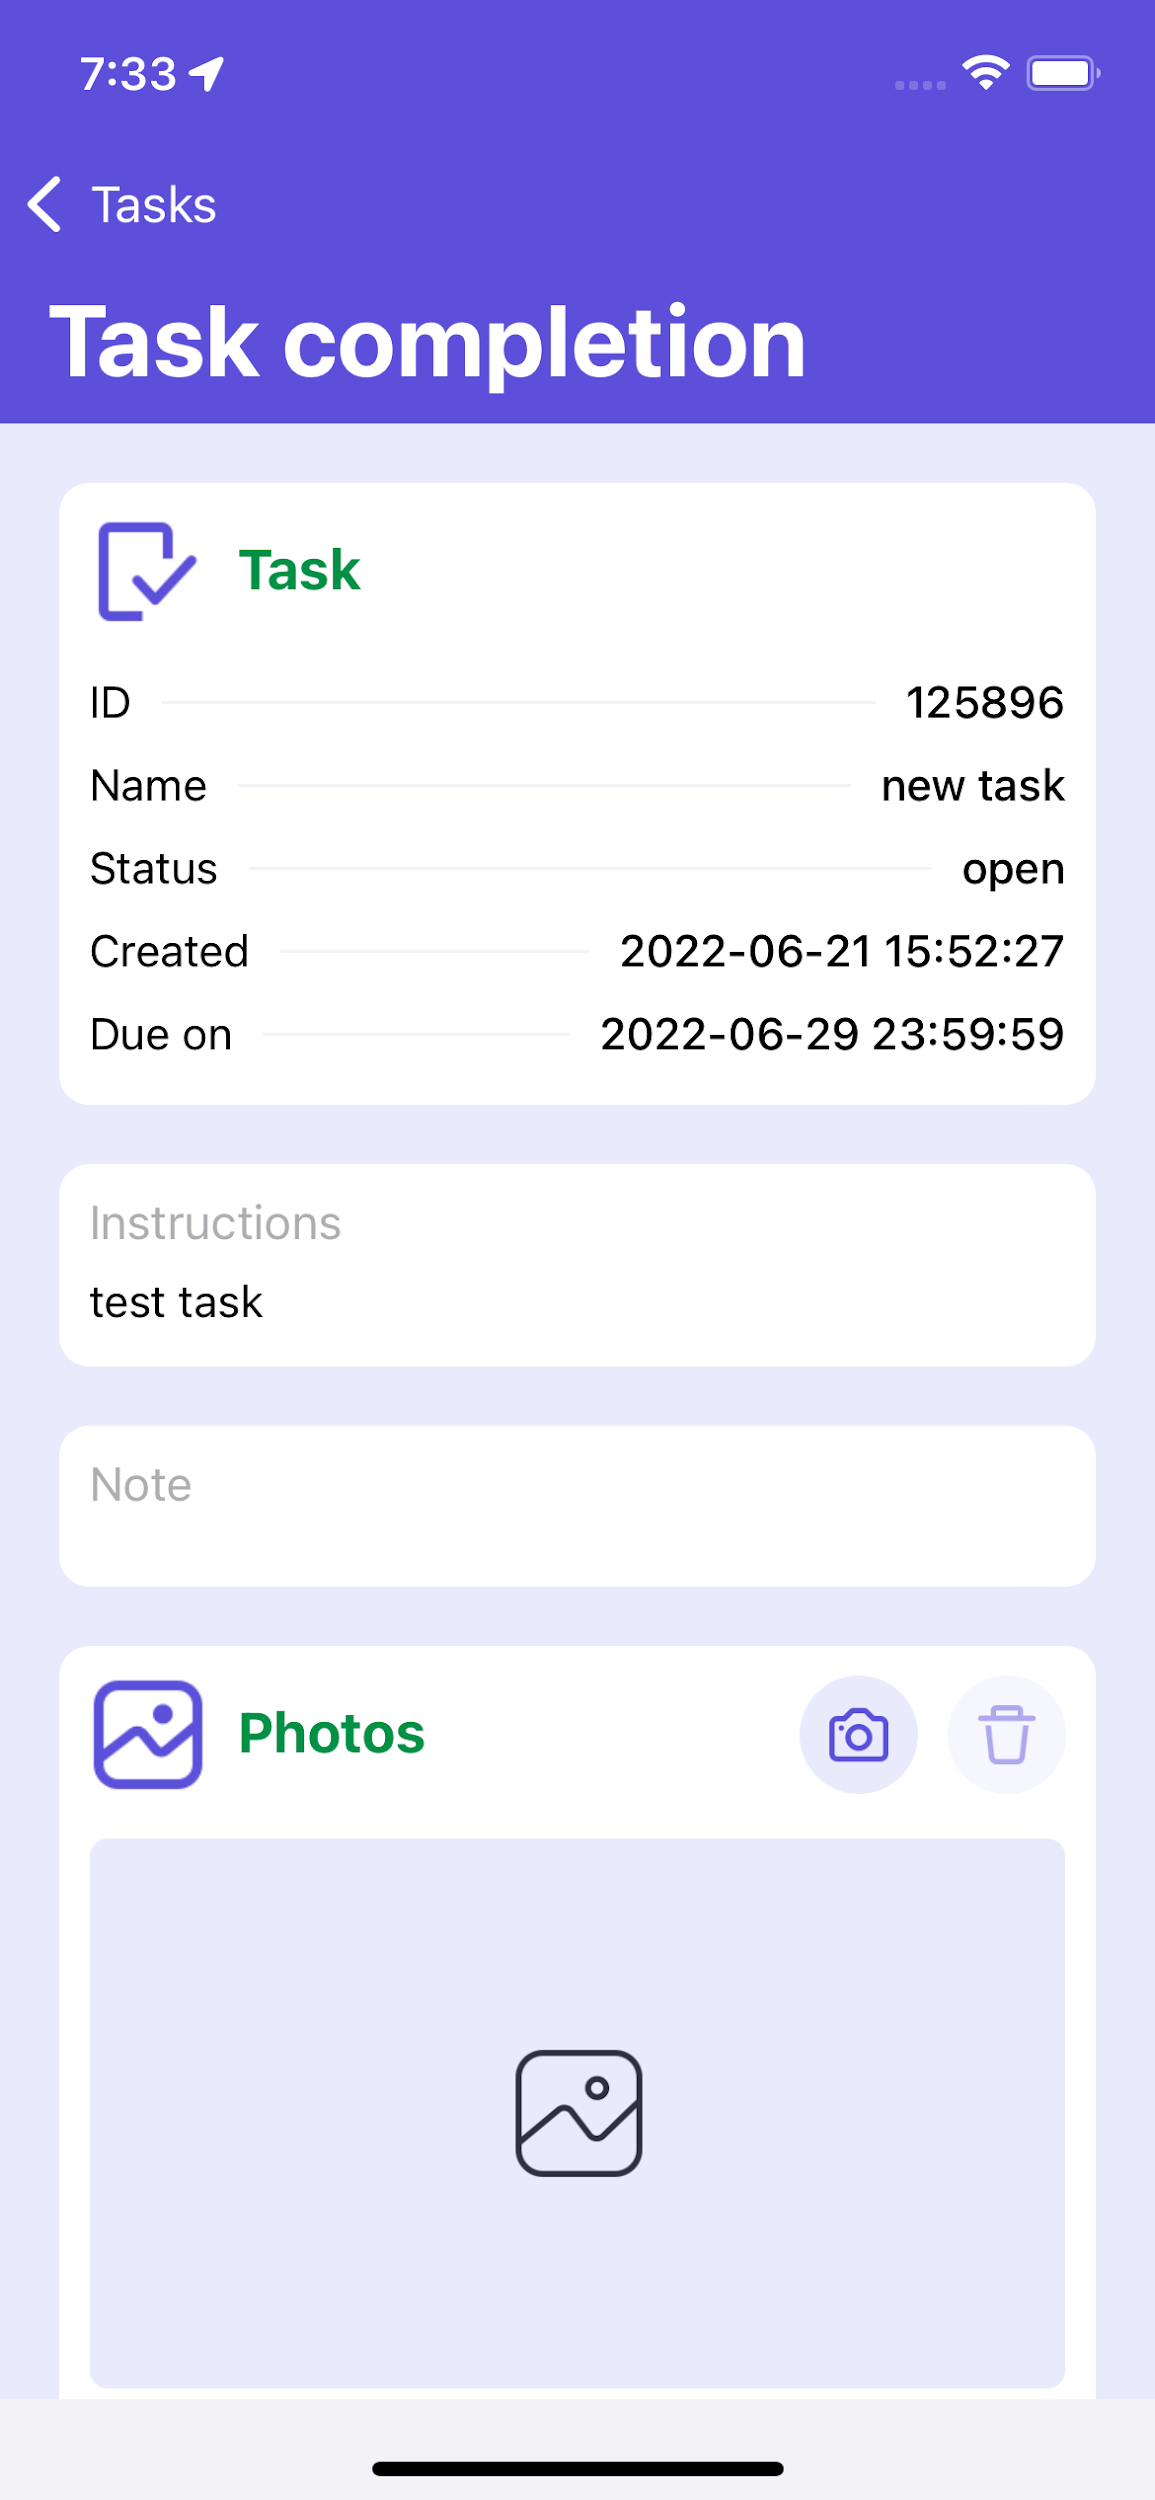
Fig. 24 Task edit
Clicking on the photo preview will open a window with its detail (Fig.
23). The basic attributes of the photo are displayed in the upper left
corner. In this view, you can switch views between all photos of the
task using the buttons
![]() and
and
![]() .
.
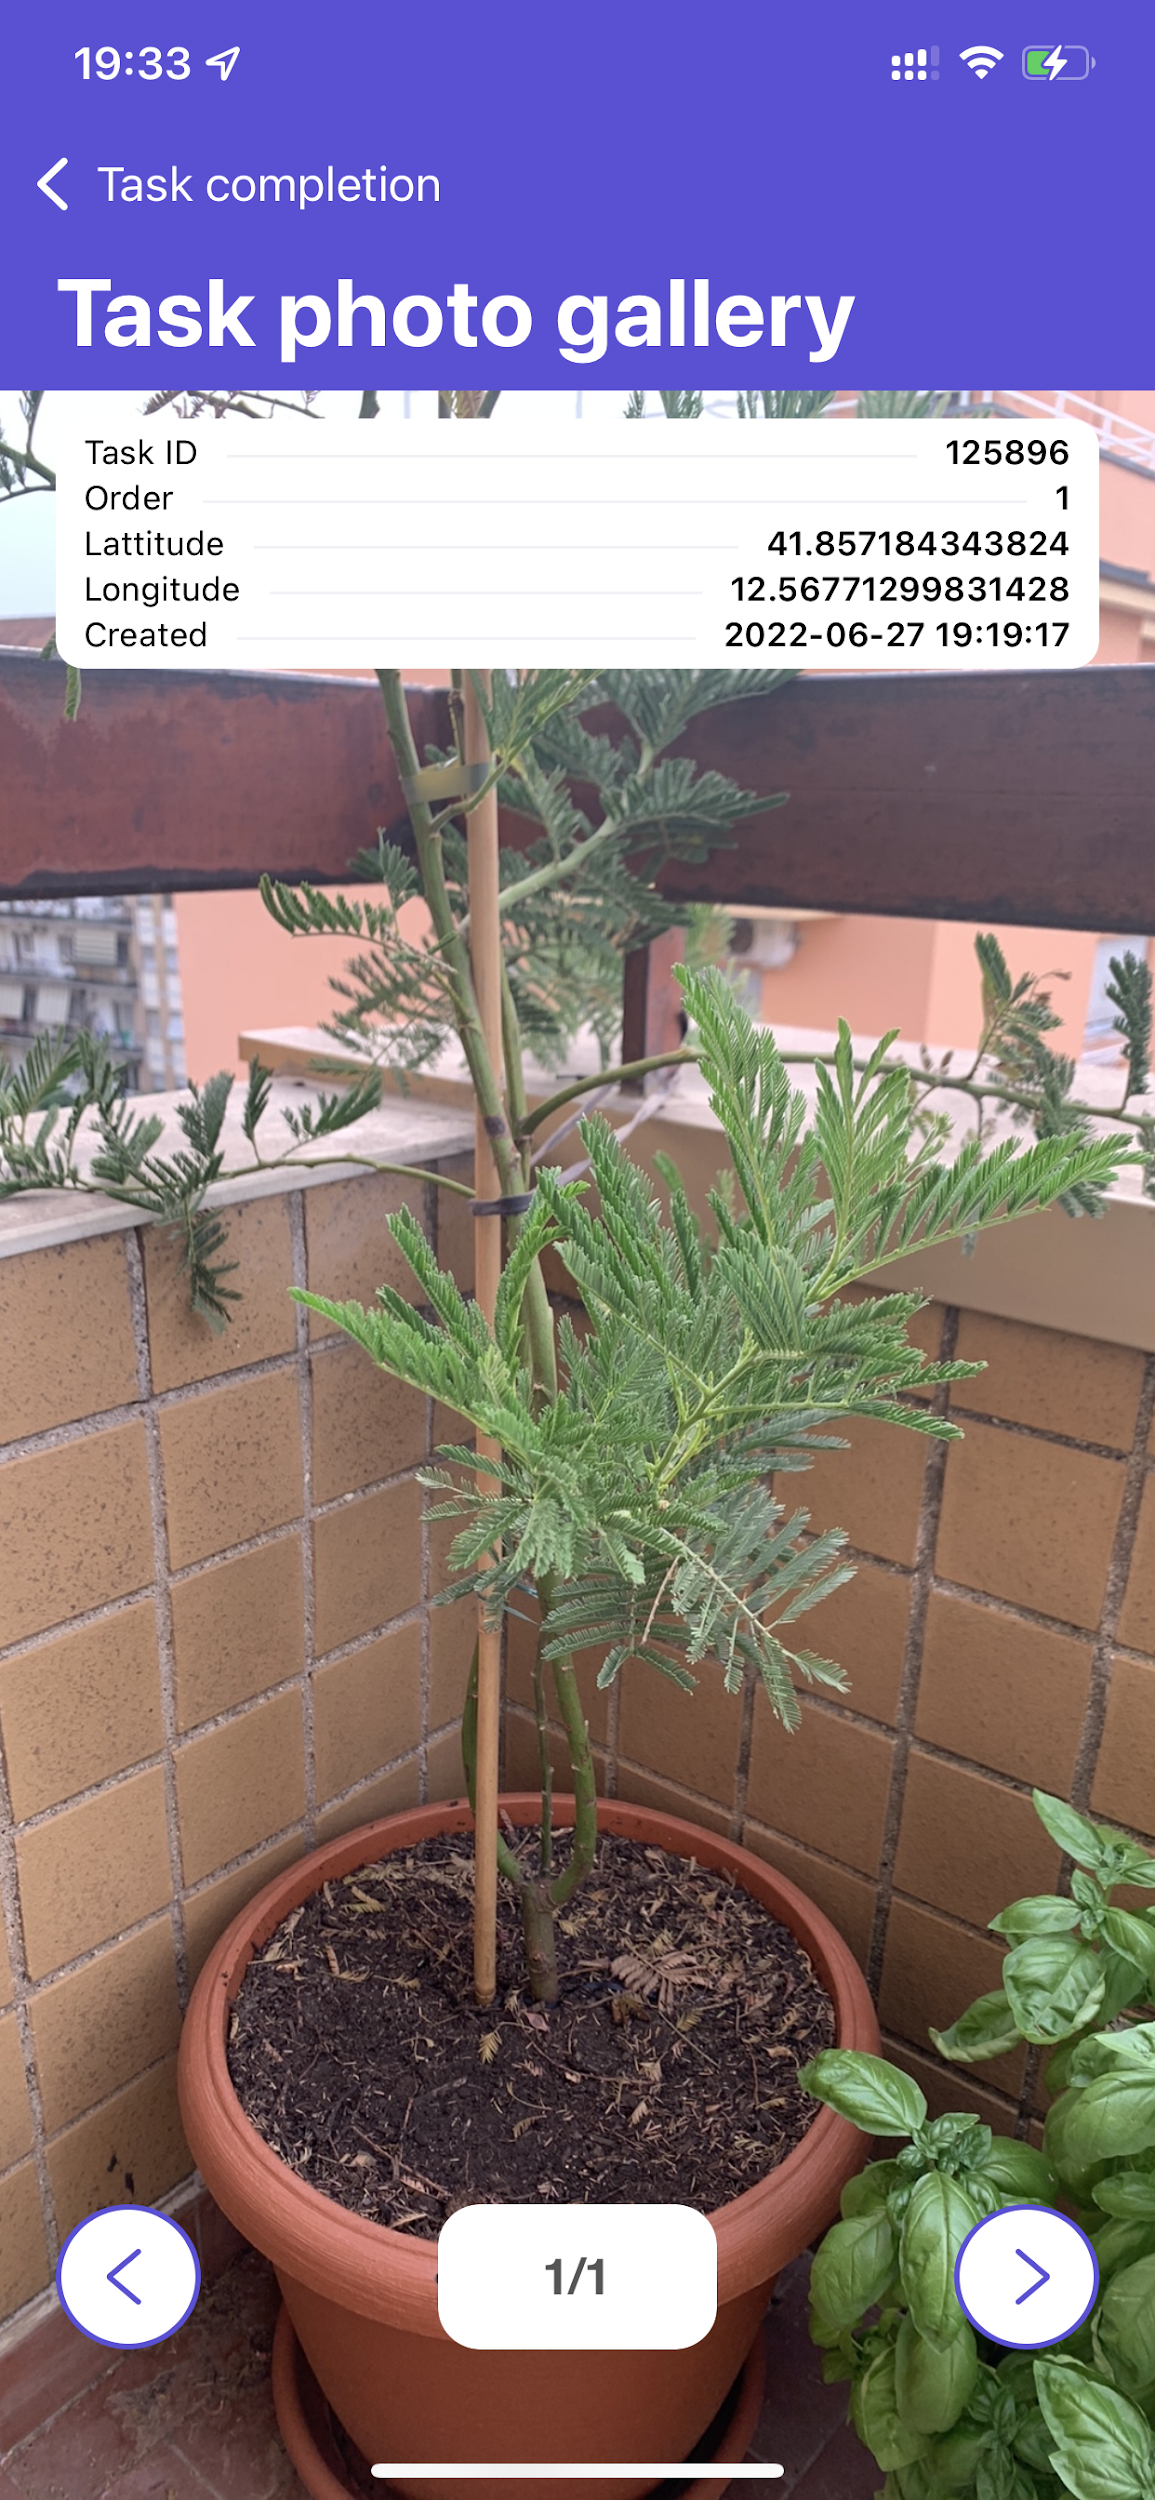
Fig. 25 Photo detail
Standalone Snapshots
Screen showing photos in the list (Fig. 24) taken separately outside the task. In each list item, on the left is a preview of the photo and on the right a list of basic metadata.
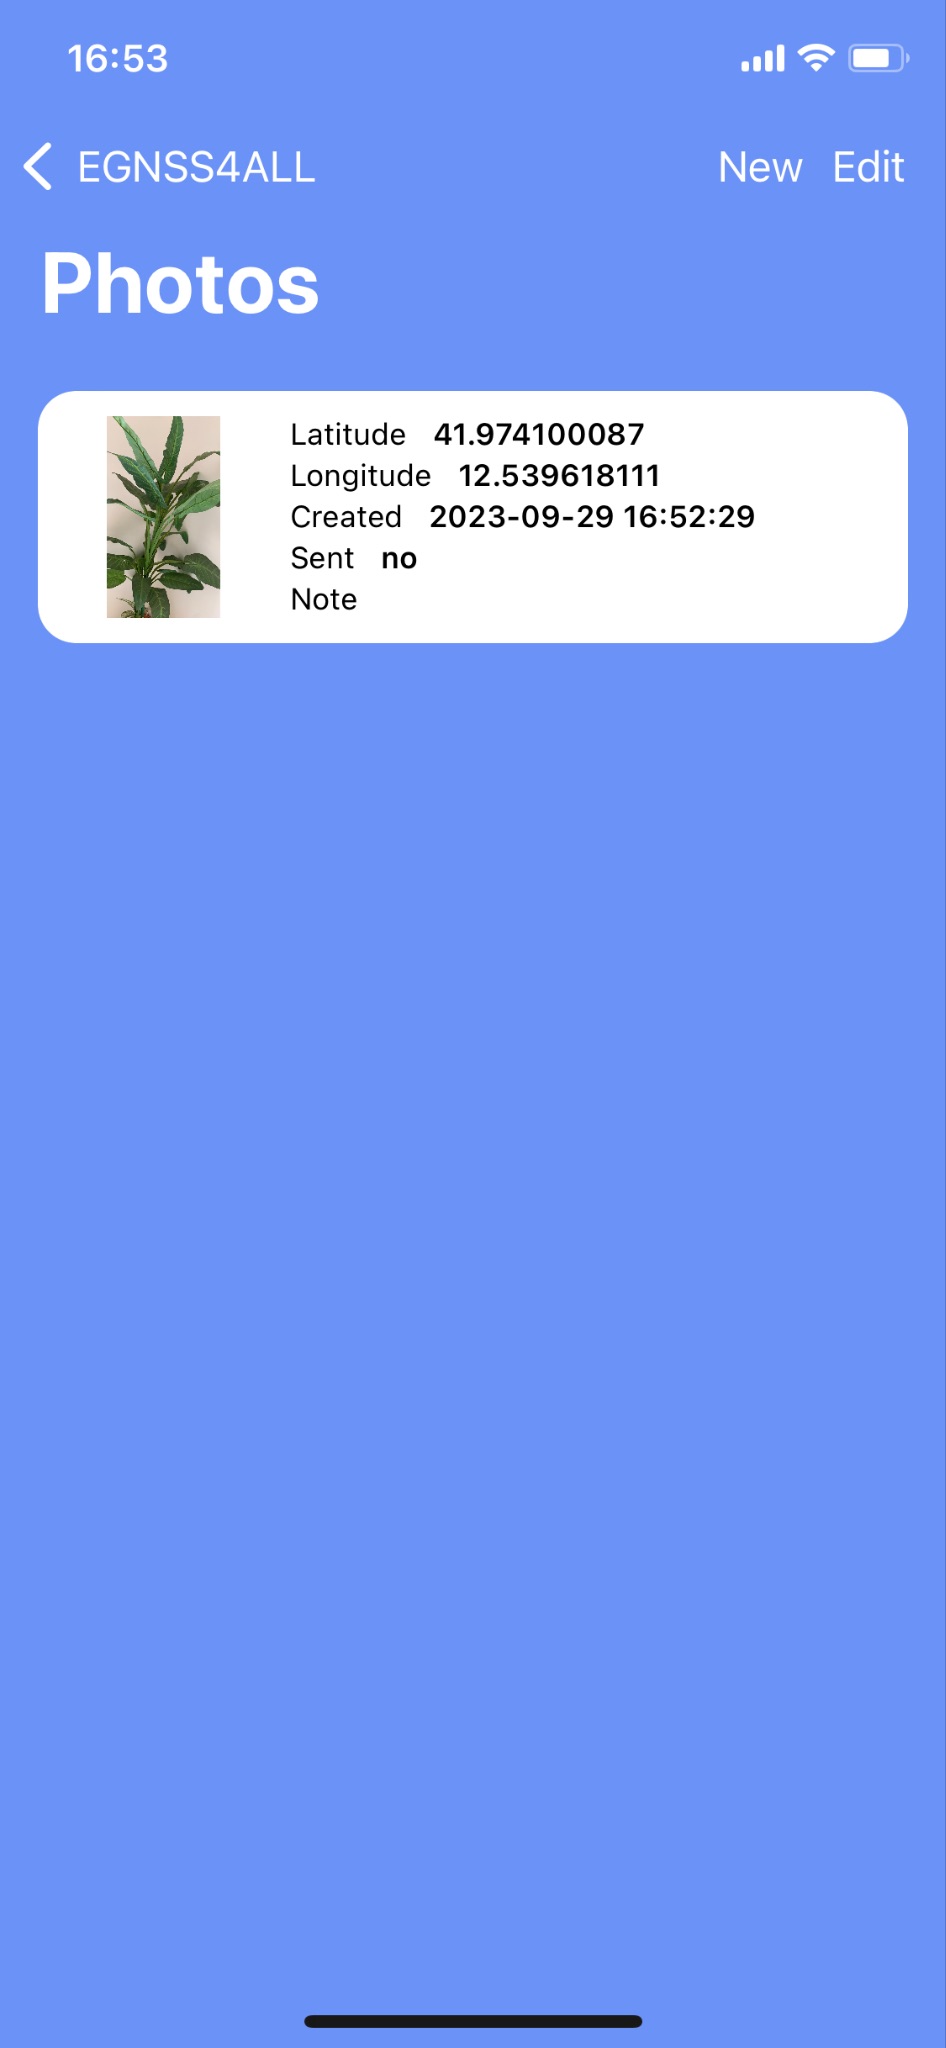
Fig. 26 Overview of standalone photos
From this screen, new photos are taken by touching of a button NEW, which enters the user to take camera mode (Camera Mode).
Clicking on a photo item in the list opens its detail (Fig. 25). Click the SEND button to send the photo to server.
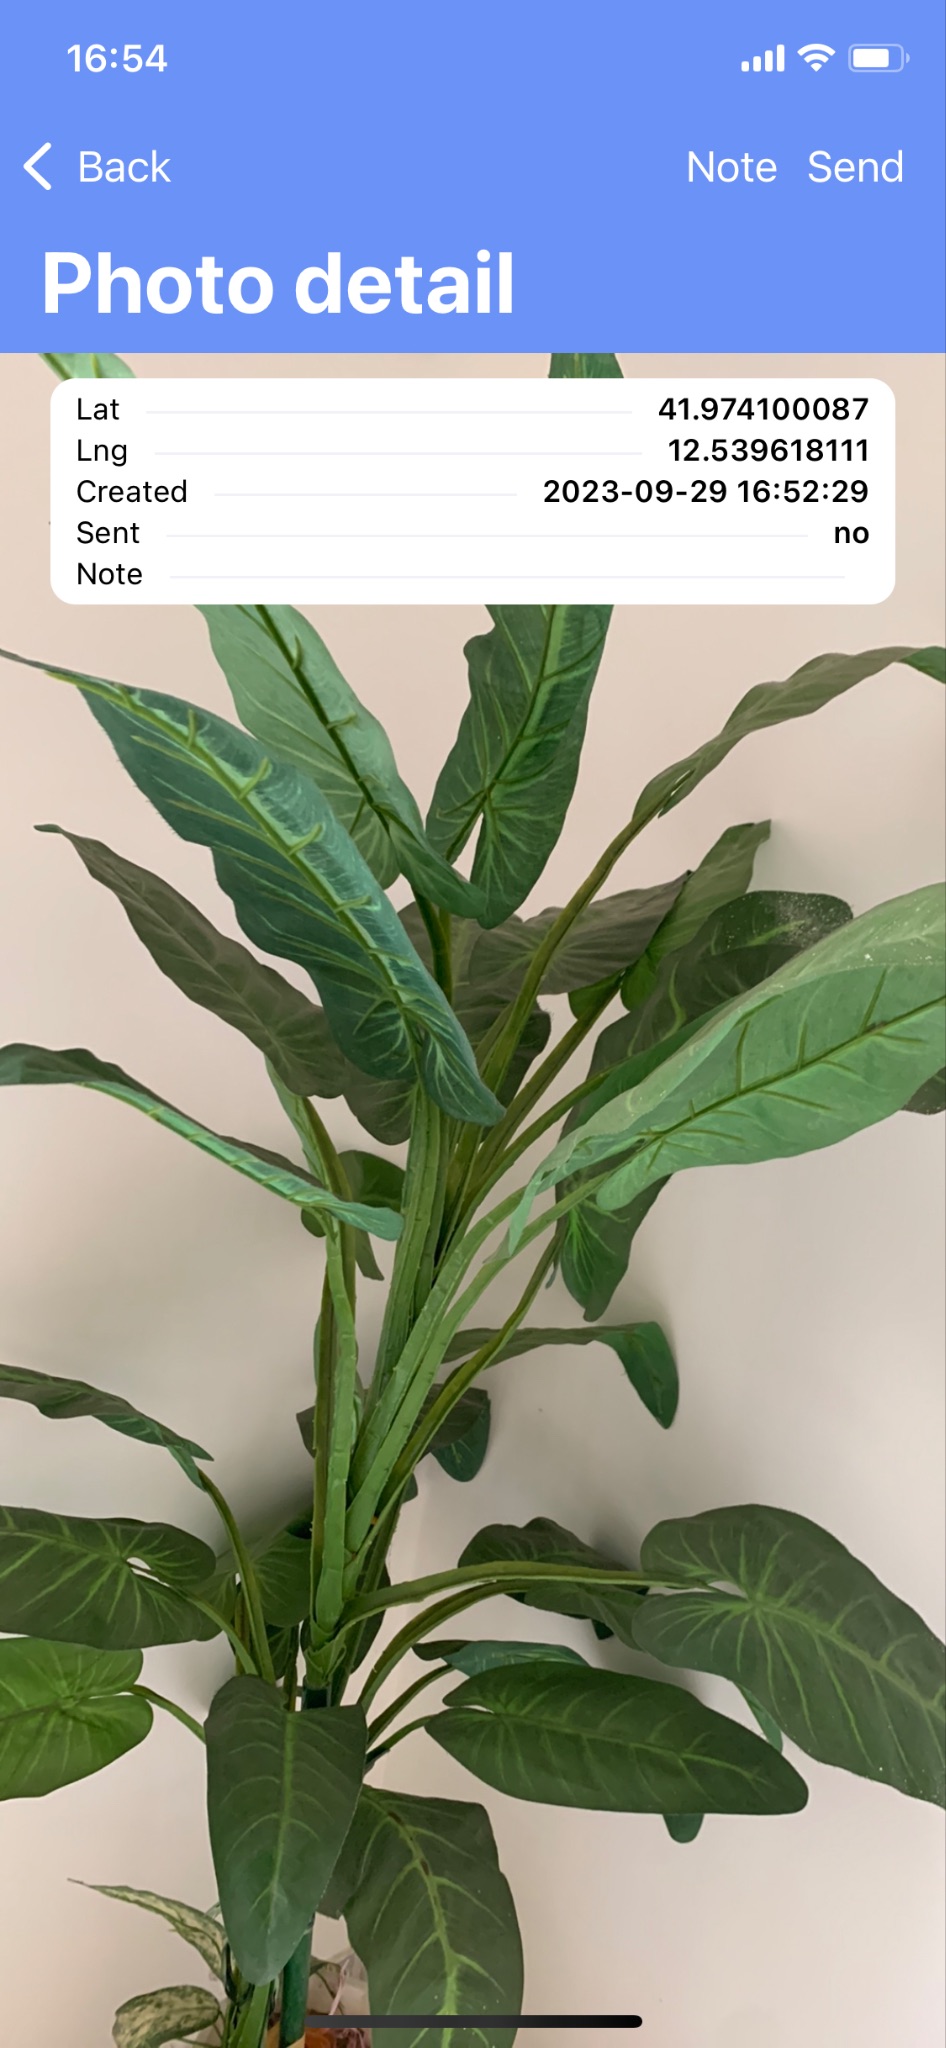
Fig. 27 Detail of a standalone photo
It’s possible to export a PDF file with the relevant data of the picture with the “PDF” button on the bottom.
Camera Mode
A camera screen interface is used to take a single photo or a photo for a task (Fig. 26).
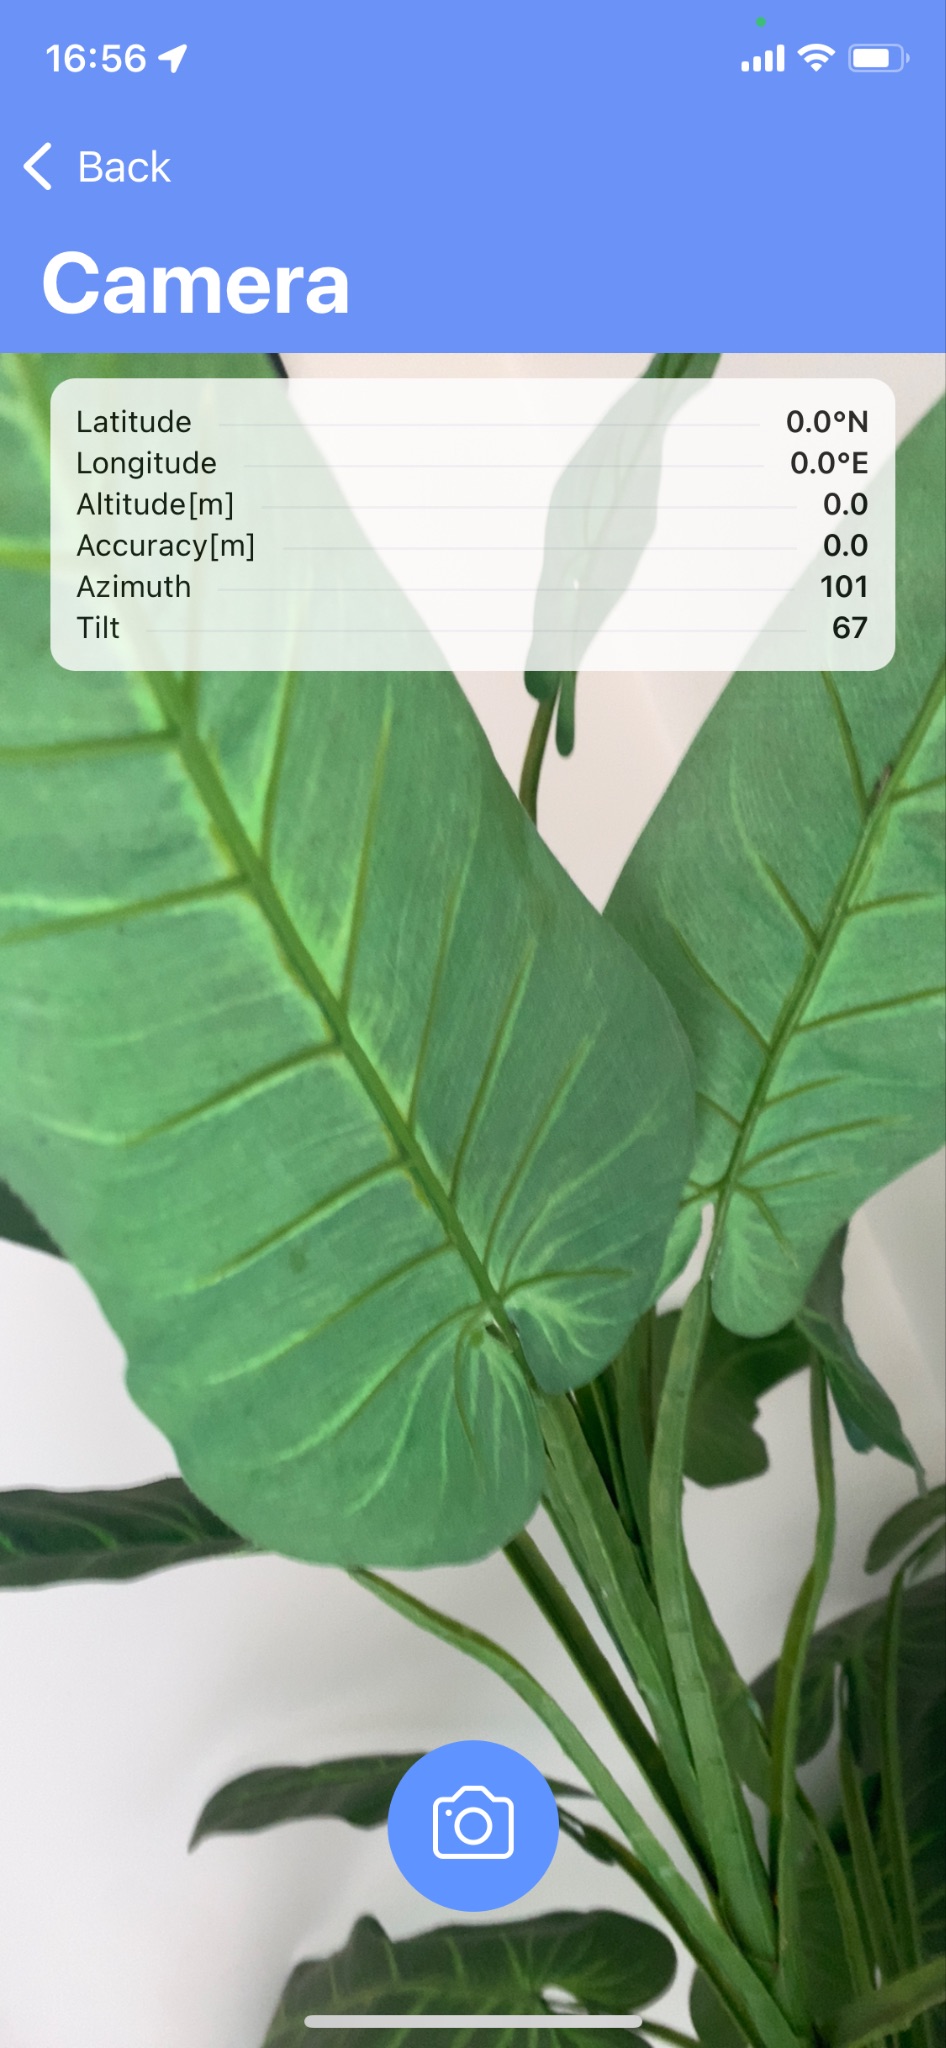
Fig. 28 Camera mode screen
The basic location data is displayed in the upper left corner:
-
Latitude indicates the latitude in degrees.
-
Longitude indicates longitude in degrees.
-
Altitude indicates the height above the reference surface of the WGS 84 ellipsoid.
-
Accuracy is an estimate of horizontal accuracy as the radius of reliability.
-
Image azimuth indicates the azimuth of the horizon the camera captures.
-
The angle expresses, in degrees, the tilt of the vertical axis of the screen to project on the horizontal surface of the earth.
If shooting with position center of gravity calculation is enabled in the settings, a window with data on the currently calculated position center of gravity is also displayed:
-
Latitude indicates the latitude of the center of gravity in degrees.
-
Longitude indicates the longitude of the center of gravity in degrees.
-
Samples indicates the current number of processed samples to the total number specified in the application settings.
The camera supports both portrait and landscape shooting.
The photo is taken by tapping the camera
![]() . Then the auto shutter will release with a countdown of approximately 5
seconds. The following conditions must be met to take a photo:
. Then the auto shutter will release with a countdown of approximately 5
seconds. The following conditions must be met to take a photo:
-
The device must have a sufficiently good reception of location data.
-
The user must not move and must stand still.
In addition, if center-of-gravity photography is permitted:
- The center of gravity of the position must already be calculated or a predetermined number of samples must be collected for its calculation.
If any of these conditions are not met, a warning message will be displayed, shooting will not be enabled and the shooting button will not be available. If any of these conditions are violated during auto shutter release, the image will also be rejected.
Click the button
![]() to close the Camera mode and return to the previous screen.
to close the Camera mode and return to the previous screen.
Map
The map is showing a group of photos of the logged in user (from sets of individual photos or photos within tasks and the currently recorded or already recorded paths
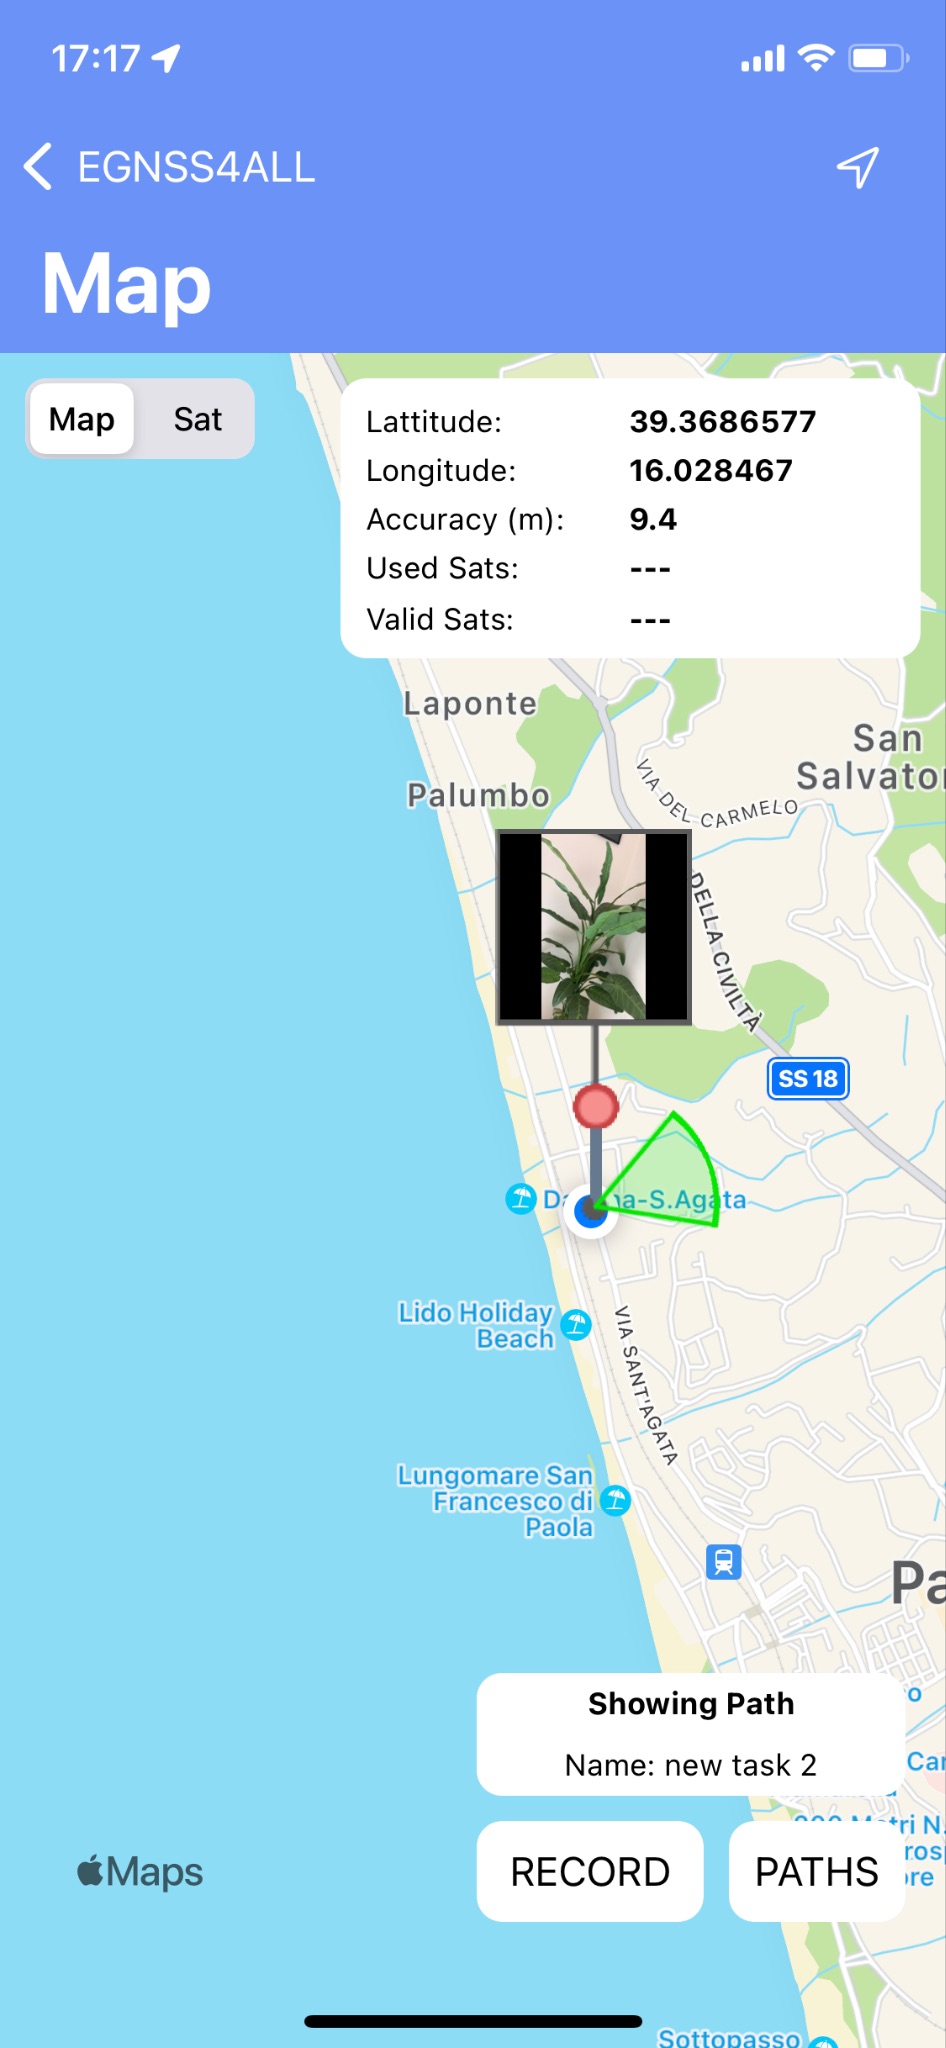
Fig. 29 The map photos and tracked paths
If location data is available, the current position will be marked on the map in the form of a blue dot
![]() . Button
. Button
![]() switches the map view to a satellite or a map view.
switches the map view to a satellite or a map view.
There is a black dot in the photo mode of the map at the location where
the image was taken, with a small icon above it. The green circle
determines the azimuth direction of the mobile device's screen at the
time the photo was taken. Press the image icon to display an overview of
the basic attributes of the image. You can record a path in the map
view. Click the RECORD button, the dialog opens for entering a path
name, which is optional. When this dialog is confirmed, the path will be
recorded. The user can switch the application screens at will when
recording the path, but the application must remain active. The path is
recorded in the form of points, between which there is an approximate
recording interval of 1 second. When recording, the path is
simultaneously drawn on the map in the form of a black linearly angled
curve. Each point on the curve is represented by a pin
![]() . When you click on it, an overview of its geolocation data is
displayed. Click the STOP button to end the recording. The path is then
drawn as a polygon, where the first and last points of the path are
connected. Click the PATHS button to go to the list of already
recorded paths (Paths), where you can select a path to draw it on the
map. Fields id and name of the drawn path on the map (currently
recorded or already recorded) are displayed in the overview next to the
buttons for recording the route. Clicking in this report will move the
map view to this path. In the application settings, you can turn on a
sound tone when recording a path point and automatically pan the map
view to the current location during recording.
. When you click on it, an overview of its geolocation data is
displayed. Click the STOP button to end the recording. The path is then
drawn as a polygon, where the first and last points of the path are
connected. Click the PATHS button to go to the list of already
recorded paths (Paths), where you can select a path to draw it on the
map. Fields id and name of the drawn path on the map (currently
recorded or already recorded) are displayed in the overview next to the
buttons for recording the route. Clicking in this report will move the
map view to this path. In the application settings, you can turn on a
sound tone when recording a path point and automatically pan the map
view to the current location during recording.
Paths
This list shows all recorded routes (Fig. 28). Clicking on a specific road will draw it on the map (M). Click on the SEND button to send all paths which has not been sent yet.
- The Area attribute is an approximation of the area of a polygon formed by a path in square meters.
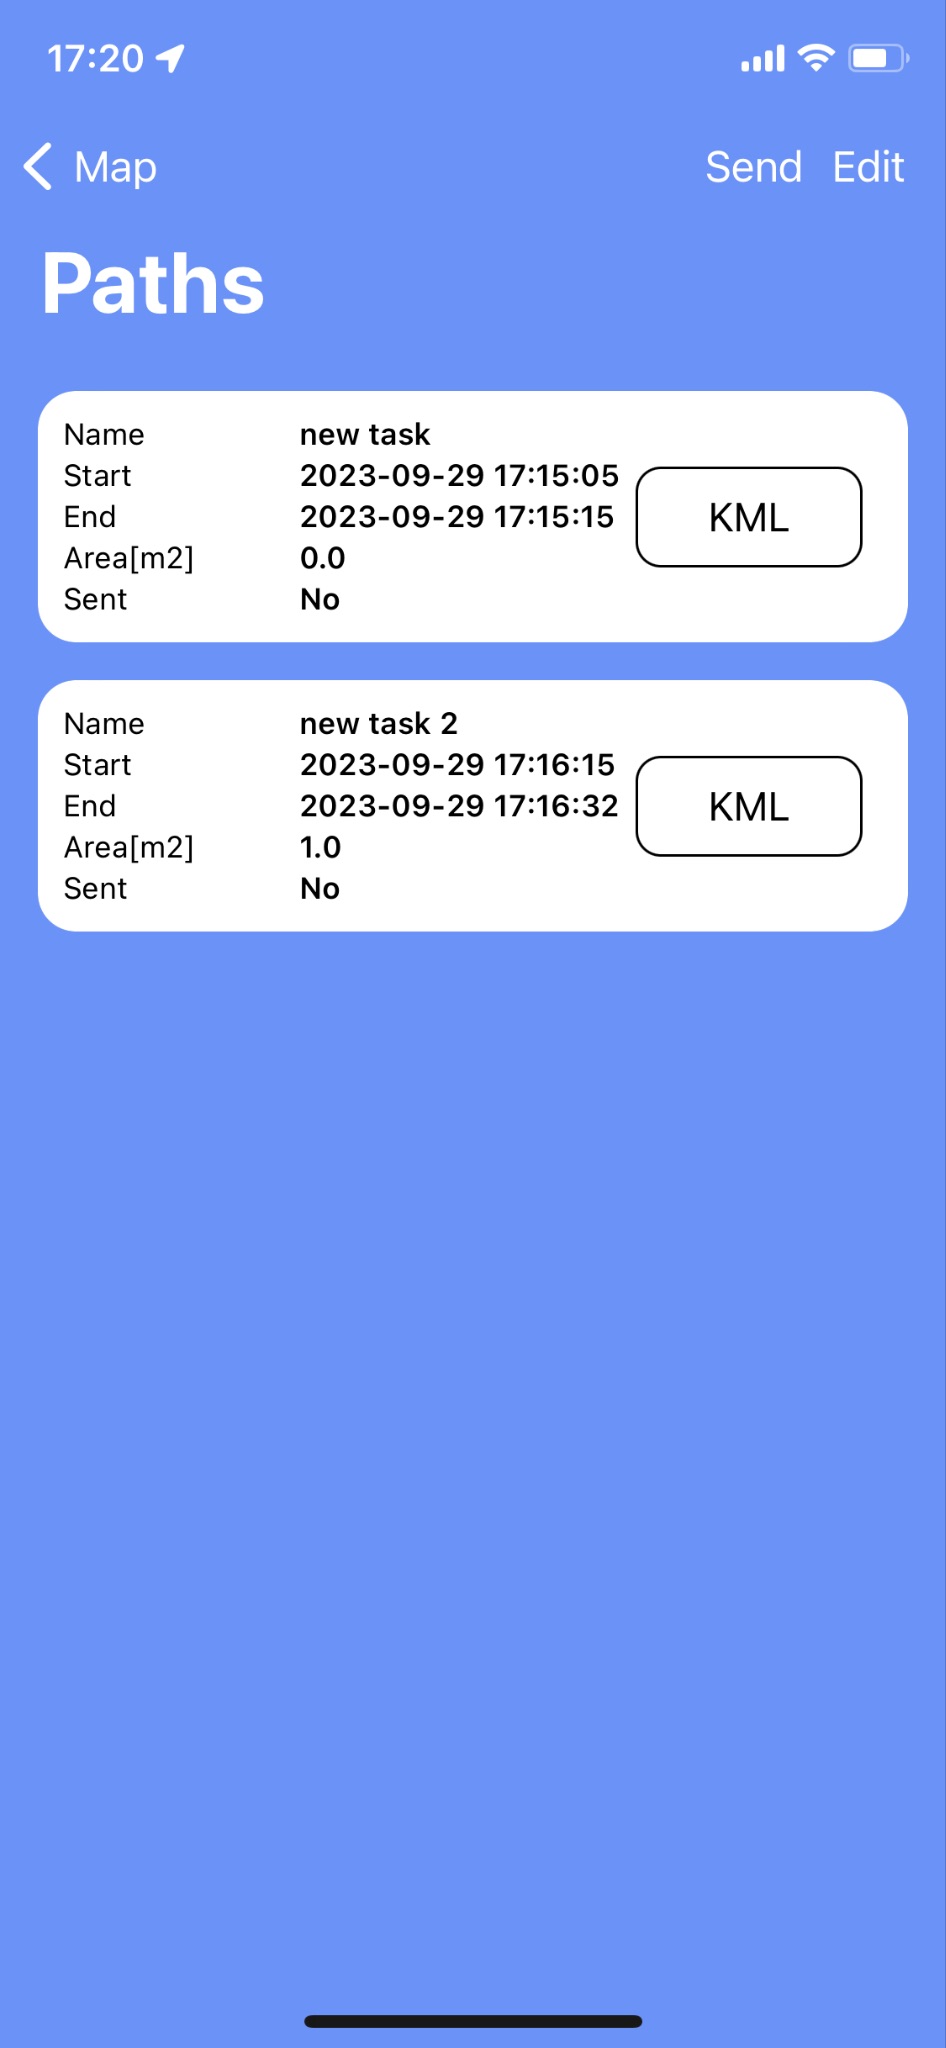
Fig. 30 Recorded paths list
Every path can be exported to a KML file on the phone with the respective “KML” button.
GNSS SkyMap
This section let you view the expected sky map of satellites.
A constellation drop-down menu let you choose a constellation to view and the graph updates accordingly.
The points in blue represent the calculated satellites position.
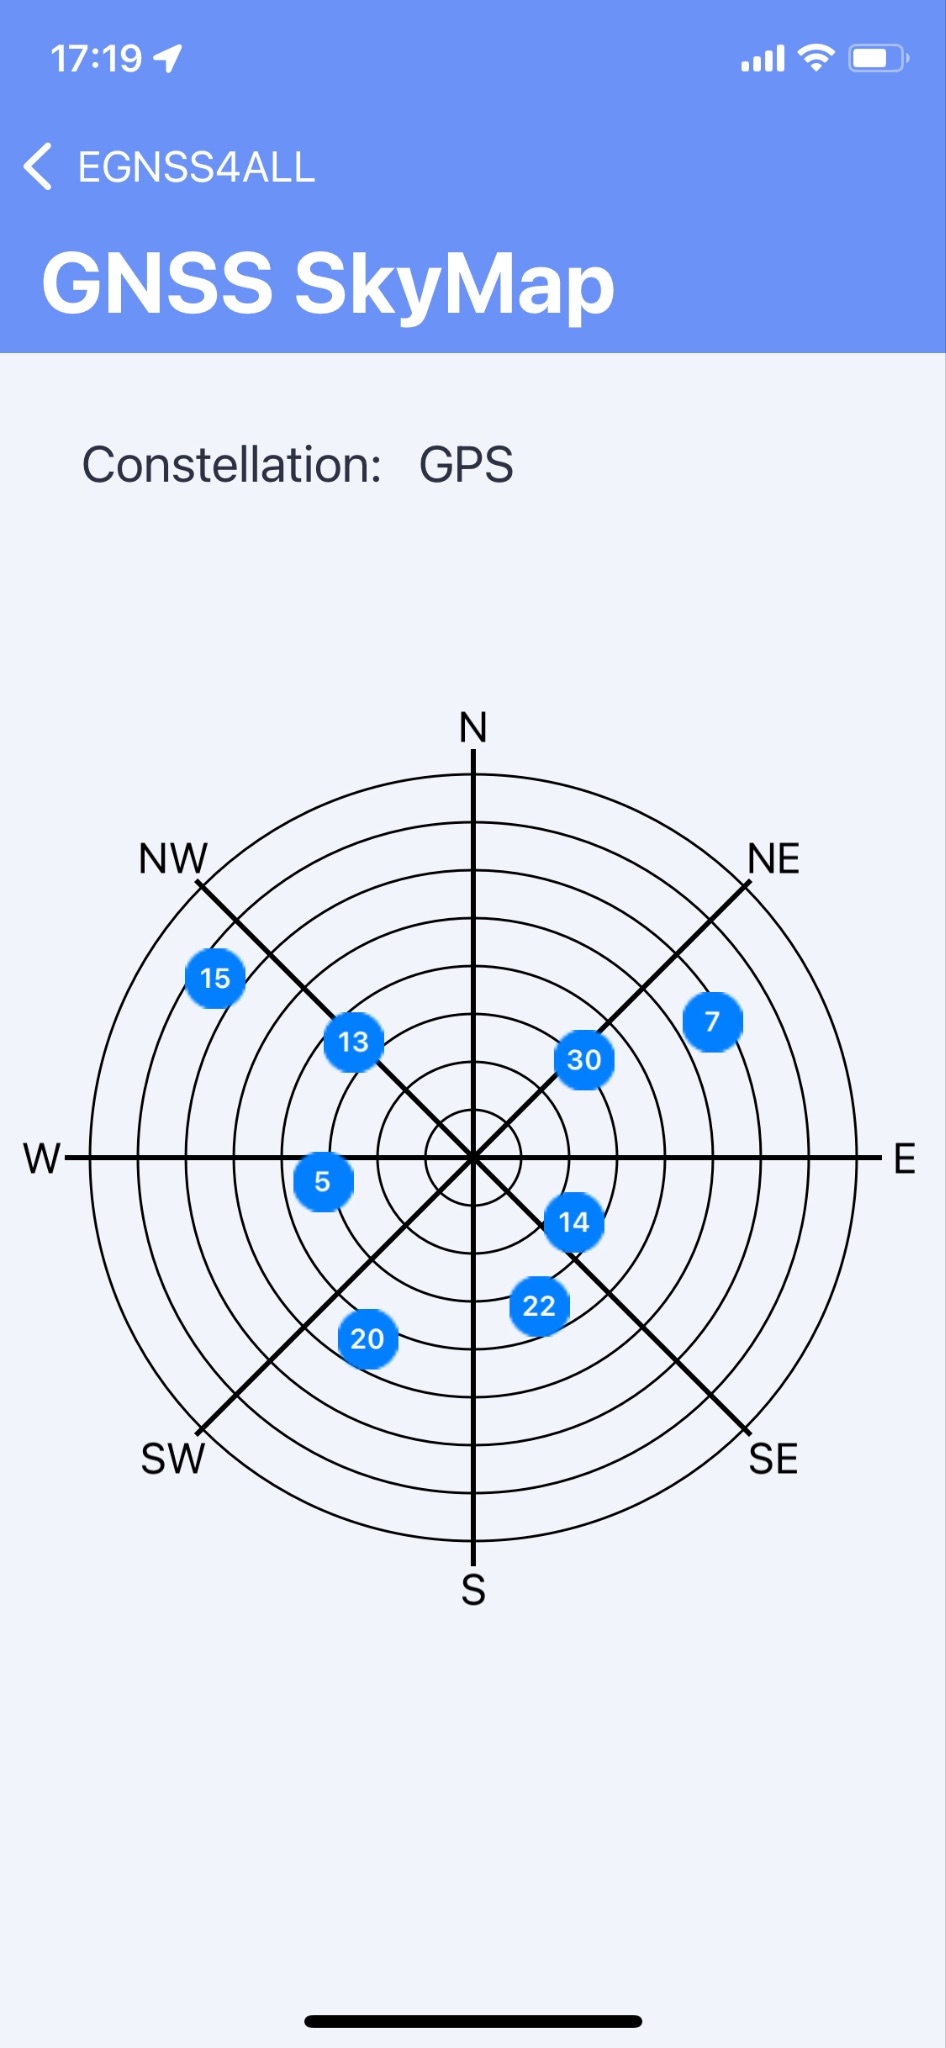
Fig. 31 GNSS SkyMap
About
This screen contains basic information about the application (Fig. 30).
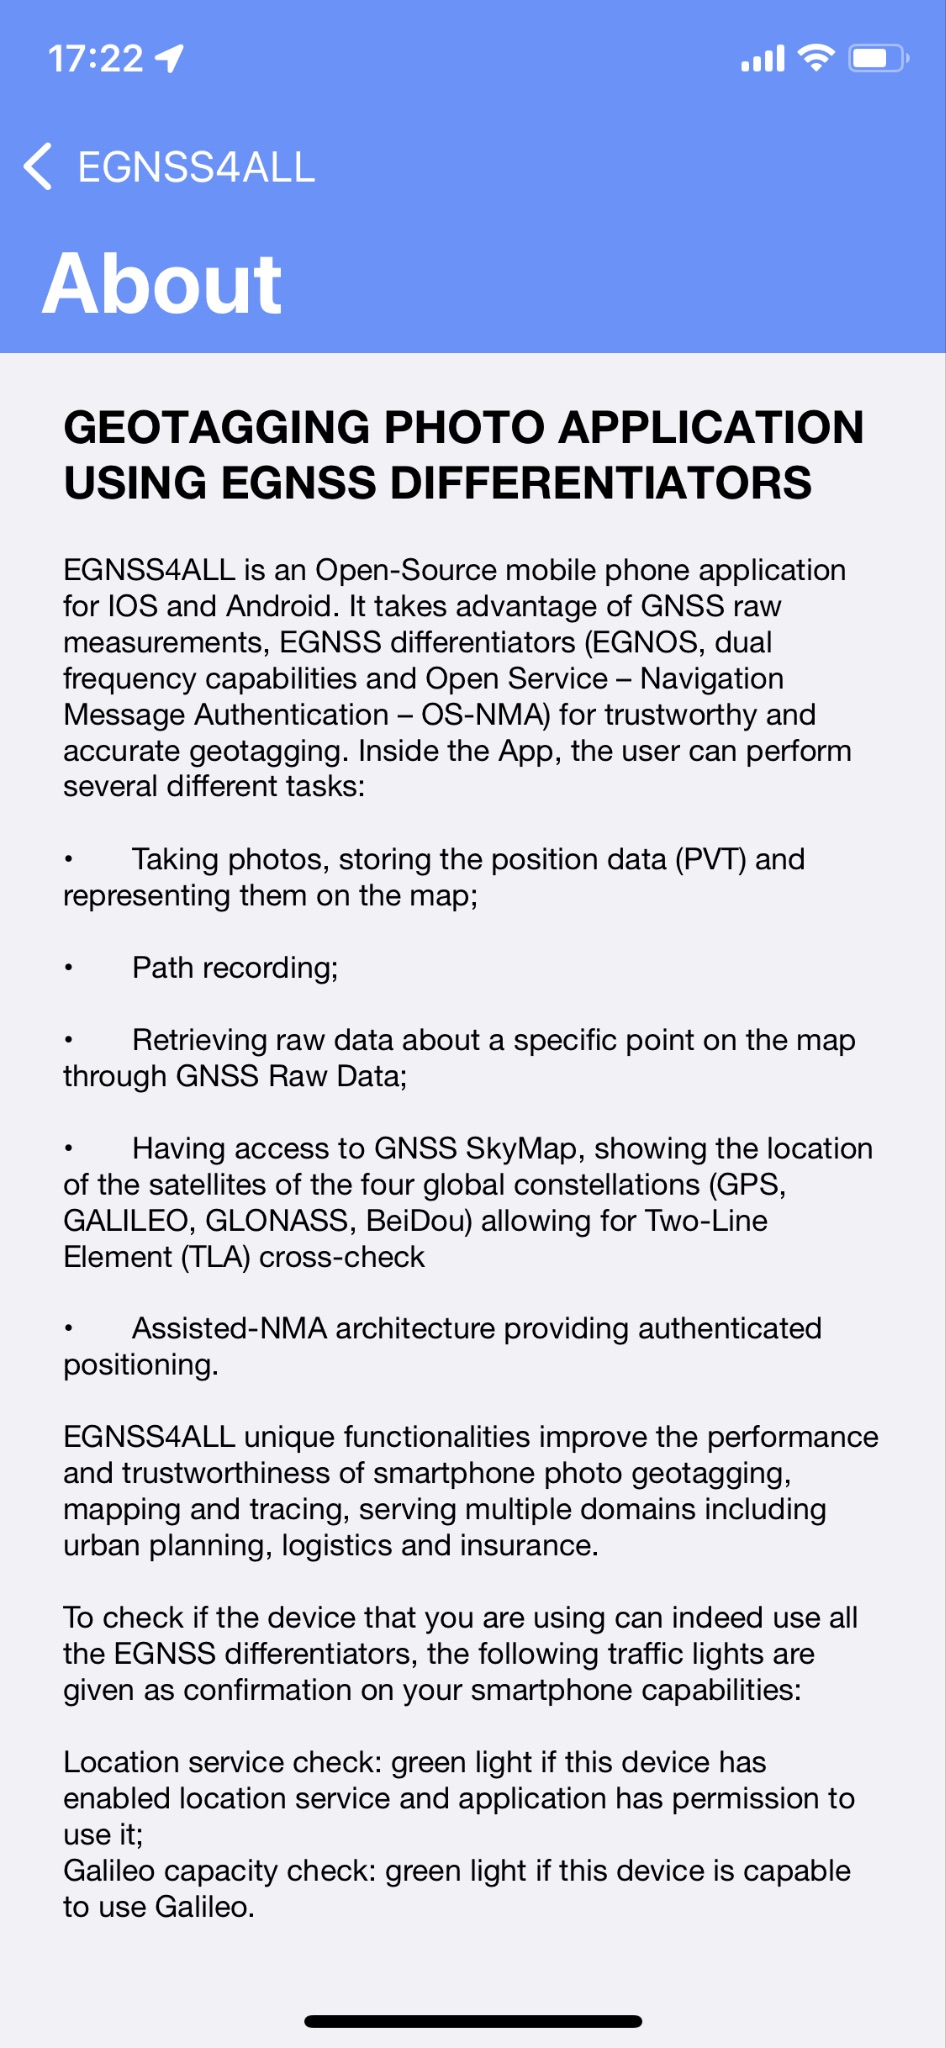
Fig. 32 About screen
Settings
The screen provides the main settings of the entire application (Fig. 31).
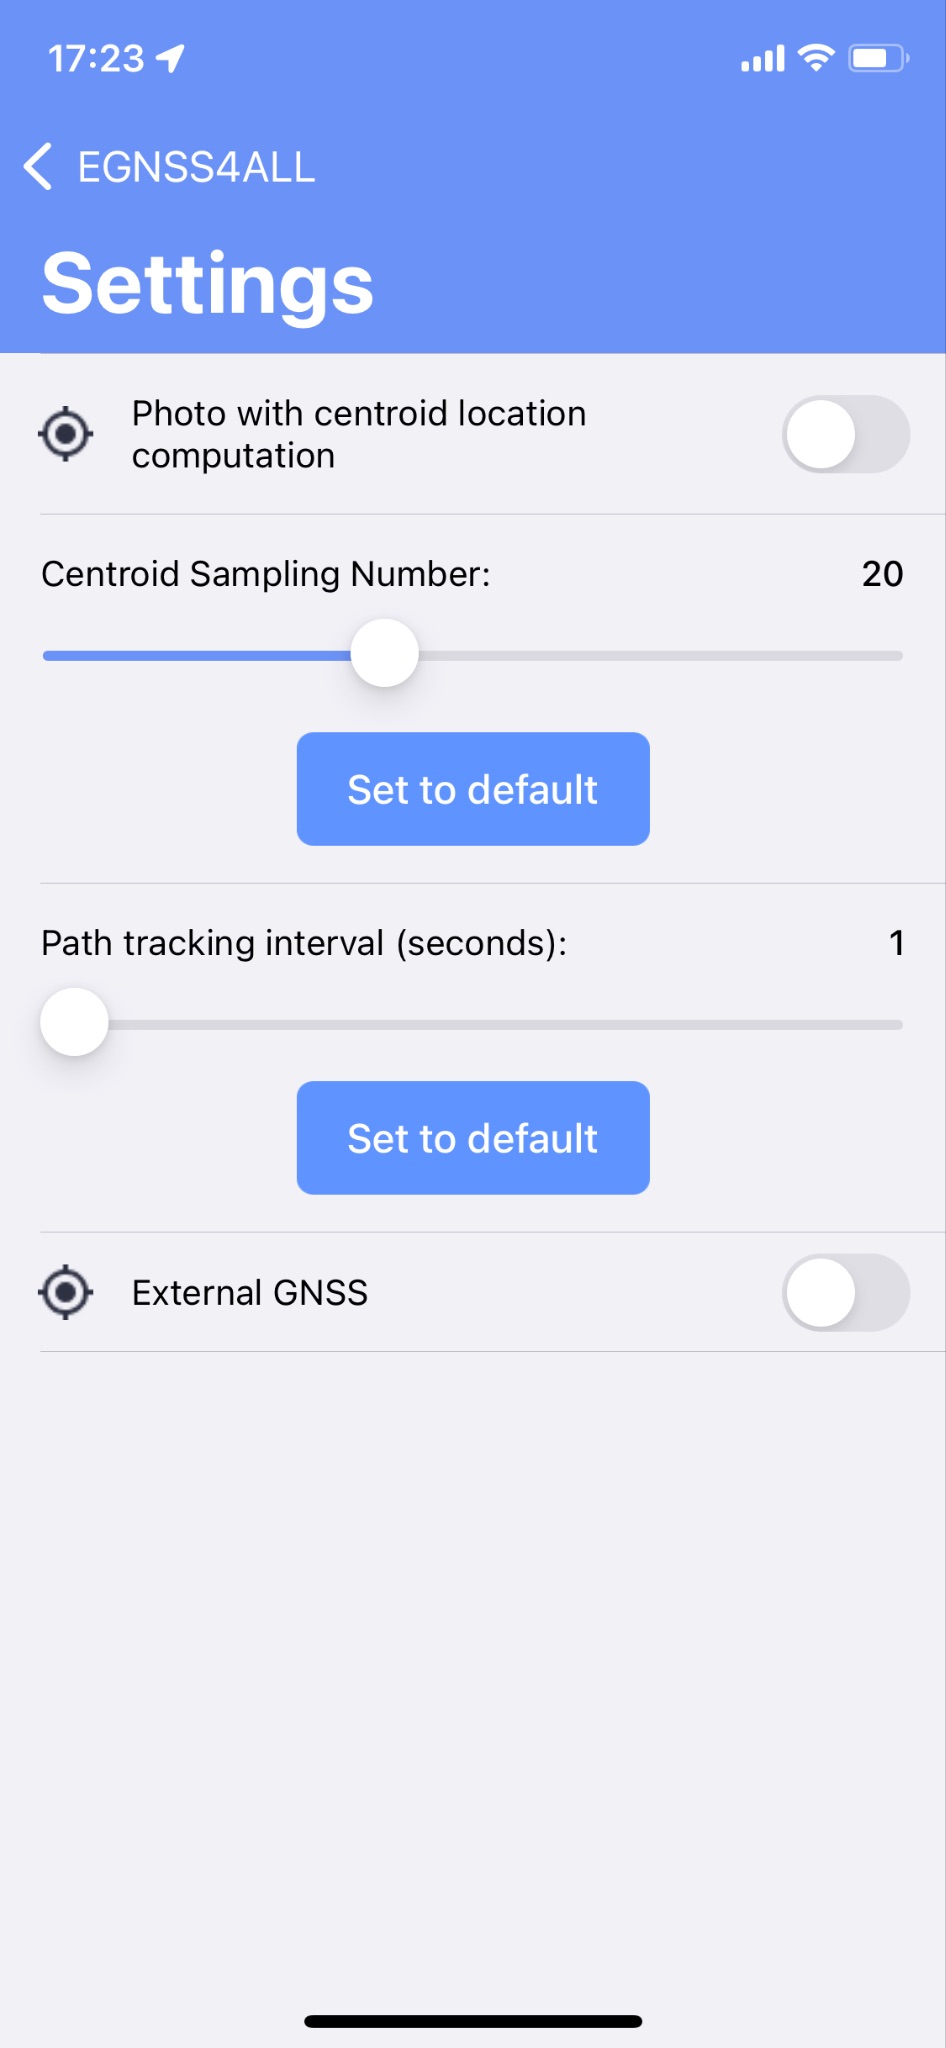
Fig. 33 Settings Screen
- Photo with centroid location computation
- When capturing an image, location center of gravity information will be added to its metadata.
- Centroid Sampling Number
-
Sets the number of samples required to calculate the position center of gravity.
-
Click the Default button to set the default number.
Clicking the SET DEFAULT VALUES button returns all filter values to the default.
External Bluetooth GPS / GNSS
This section allows to scan for an external GPS Device and pair it to your application to use it as the source of the location.
The button SCAN DEVICES allow you to start scanning for devices, a list of devices detected will appear. After choosing a device, you can press TEST CONNECTION to test if the device is connected AND compatible with the application.This setting is saved and the device data will be used for all location instances in the application (map, tracking and photo).
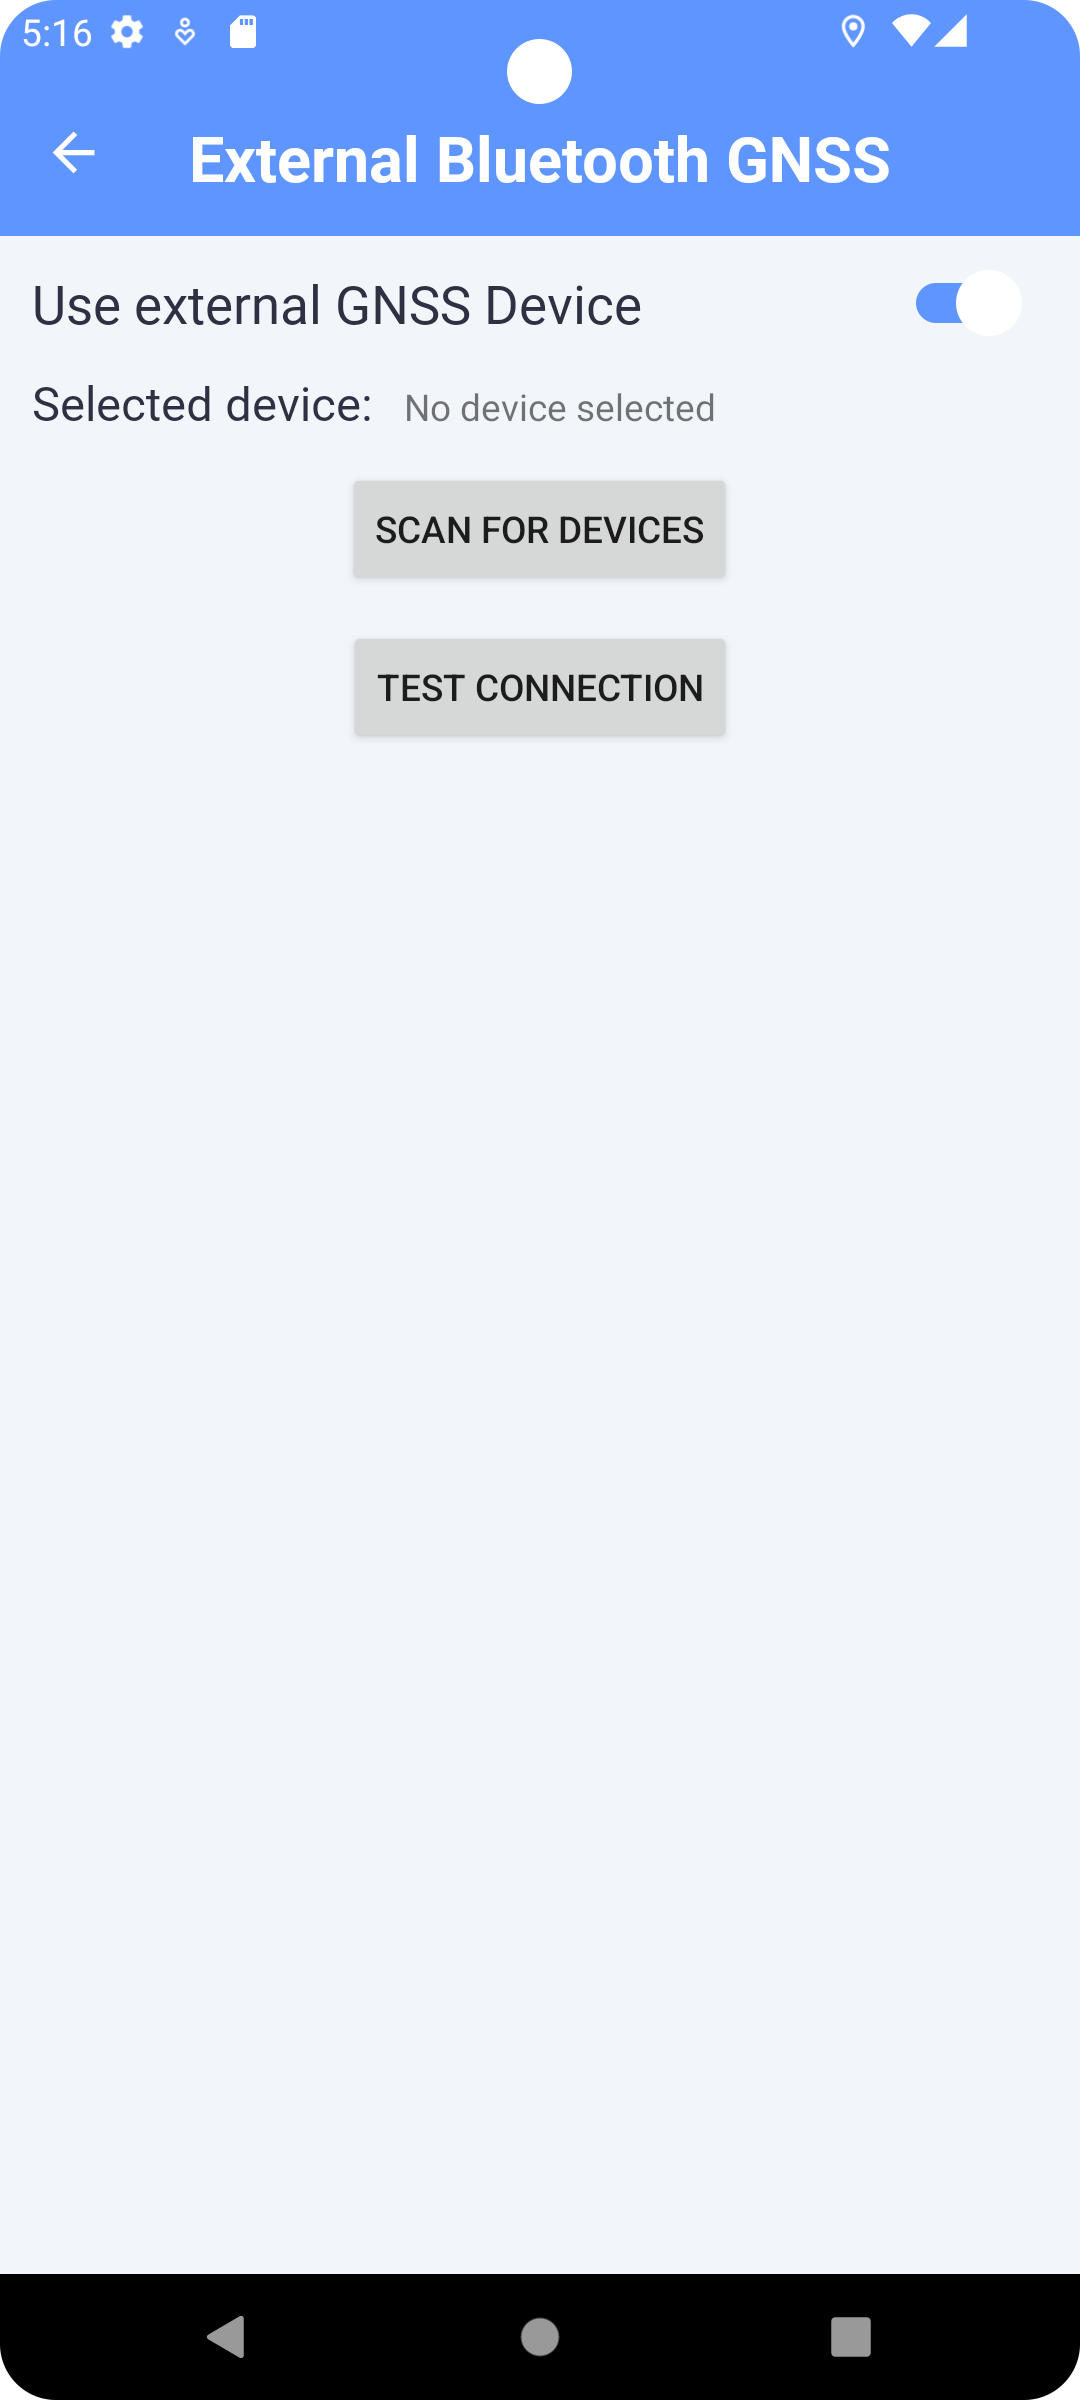
Fig. 19 External Bluetooth GPS
Offline Usage
Once you have logged in, it is possible to operate in offline mode. Some services, such as Skyview and maps, will not be available, but you will still be able to record paths or take geolocated photos, and the data can be sent once the device is back online.
Source Code Overview
General Overview
The application is developed as a regular application for the iPhone Operating System (iOS) in the Swift language build inside XCode IDE. The UI of application is built using the Storyboard. The application is written for minimal compatibility with iOS 13. The source code is structured according to the XCode project standard descripted at https://developer.apple.com/library/archive/featuredarticles/XcodeConcepts/Concept-Projects.html
The source code aims to follow this group structure:
- Each screen of the application has its own controller.
- All controllers are located in separate files in the root group.
- All background processes, some foreground processes and all application data models are located in the Model group.
The files of the source code can be divided based on these parts of the application:
- system structure,
- global structure,
- taking photos,
- task management,
- application settings,
- about screen,
- map and paths,
- login.
System Structure
This section includes all configuration files necessary for building, distributing and running the application. These files are defined according to the XCode requirement and do not define the application processes themselves or the application data structure itself.
Global Structure
This section describes the pieces of code, which are primally shared throughout the application. The application uses User Default and Core Data as a local persistent storage. There is one Core Data model for the whole application defined in the PhotoModel.xcdatamodeld, which include the following entities:
- PersitPhoto
- The captured photo as a binary picture data with all metadata.
- PersistTask
- The metadata of a task.
- PTPath
- The metadata of an entire recorded path.
- PTPoint
- The metadata of a point forming a recorded path.
Data about the user and application settings are stored in the User Default storage. This storage is accessed indirectly through classes UserStorage and SEStorage.
All UI screens are defined in Main.storyboard. Description of files:
- AppDelegate.swift
- The application delegate object that manages the application’s shared behaviors. The application delegate is effectively the root object of whole app, and it works in conjunction with UIApplication to manage some interactions with the system:
- Initializing your app’s central data structures.
- Configuring your app’s scenes.
- Responding to notifications originating from outside the app, such as low-memory warnings, download completion notifications, and more.
- Responding to events that target the app itself, and are not specific to your app’s scenes, views, or view controllers.
- Registering for any required services at launch time, such as Apple Push Notification service.
- Loads and holds the Core Data PhotoModel persistent container.
- The application delegate object that manages the application’s shared behaviors. The application delegate is effectively the root object of whole app, and it works in conjunction with UIApplication to manage some interactions with the system:
- SceneDelegate.swift
- Defines UIWindowSceneDelegate object to manage the life cycle of one instance of this application's user interface. The window scene delegate conforms to the UISceneDelegate property, and it is used to receive notifications when its scene connects to the application, enters the foreground, and so on.
- extensions.swift
- Contains extensions of all system classes.
-
Model/PersistStorage.swift
- The base class registering all derived classes for access to the User Default storage.
-
Model/ UserStorage.swift
- The class for accessing logged user data in the User Default storage.
- Model/Setting/SEStorage.swift
- The class for accessing application settings in the User Default storage.
- Model/ Util.swift
- The class containing general helper functions.
- Model/Weak.swift
- The class holder for weak reference.
- Model/DB/DB.swift
- The class that provides a private managed object context and a shared main managed object context for PhotoModel.
- Model/DB/PersistPhoto+CoreDataClass.swift
- Defines additional convenience methods inside the PersistPhoto managed object class.
- Model/DB/PersistTask+CoreDataClass.swift
- Defines additional convenience methods inside the PersistTask managed object class.
- Assets.xcassets
- Contains all pictures used in application.
Taking Photos
The code in this section defines how to take, edit, view and send photos. This is linked to the following screens:
- Photo overview,
- Photo detail,
- Camera.
Description of files:
- PhotosTableViewController.swift, PhotoTableViewCell.swift
- The classes to view captured photos in a list structure and to delete these photos.
- PhotoDetailViewCotroller.swift
- The controller to view a captured photo in detail and to send this photo.
- CameraViewController.swift
- The controller to display the camera preview and current location data on the screen, and to take a geotagged photo from the camera.
- Uses PhotoDataController class.
- Model/PhotoDataController.swift data that are designed to be used to take a geotagged photo.
- Model/ConvexHull/…
- The classes for computing the convex hull centroid over location data.
Task Management
The code in this section defines how to download, edit, view and send tasks. This is linked to the following screens:
- Task overview,
- Task detail,
- Photo gallery. Description of files:
- TasksTableViewController.swift, TasksTableViewCell.swift
- Classes to download and view tasks in a list structure.
- TaskViewController.swift
- The controller to view a task in detail, to add a note, to list task photos and to send a task.
- GalleryViewController.swift
- The controller to display full screen task photos as a gallery.
Application Settings
The code in this section defines how to manage application settings. This is included in the Settings screen. Description of files:
- SettingsViewController.swift
- The controller to view current settings in a list structure and to manipulate these settings.
- Model/Setting/…
- Helper classes to display setting items and handling events on those items.
- Model/Setting/SEStorage.swift
- The class for accessing application settings in the User Default storage.
About Screen
The code in this section defines how to show information about the application. This is included in the About screen. Description of files:
- AboutViewController.swift
- The controller to view the About page.
Map and Paths
The code in this section defines how to display photos on the map and to view, record, send and delete paths. This is linked to the following screens:
- Map,
- Path overview. Description of files:
- MapViewController.swift
- The controller to view the map and to draw captured photos and recorded paths on this map.
- Draws captured photos on this map using processes defined in Map/Photos group.
- Controls the path recording process from UI and draws recorded or currently recording path on this map using the processes defined in Map/PathTracking group.
- PathTrackTableViewController.swift, PathTrackTableViewCell.swift
- The classes to view recorded path in a list structure and to delete these paths.
- Map/Photos/…
- These files define views and classes to draw the captured photos on the map in the form of annotations.
- Map/PathTracking/…
- These files define views and classes to draw the recorded path or currently recording path on the map in the form of annotations, polylines and polygons.
- Map/PathTracking/PTPath+CoreDataClass.swift, Map/PathTracking/PTPoint+CoreDataClass.swift
- Additional convenience methods inside the PTPath and PTPoint managed object classes.
Login
The code in this section defines the user login process to the application. This is linked to the Login screen. Description of files:
- LoginViewController.swift
- The controller to view the login screen and to manage the login process.
- It stores data about the logged user in the UserStorage.
Gnss_scan Library
This library provides the ability to receive and process GNSS data and mobile network data in real time in a convenient way by registering callbacks to scanners of the mobile network and data from location satellites. This library is dependent on convex_hull library. The primary purposes of this library are:
- receive GNSS data and enable their further processing
- receive mobile network data and enable their further processing