Web Console
Web Console Interface
The web console is accessible through the following link: https://www.pic2bim.co.uk/
User roles
User role
- Have access to his tasks and photos, but is not able to do any operations.
Officer role
- Have access to all users that belong under his agency, can move tasks between states.
Super-admin role
-
Have access to Agency management module. Can create new agencies and manage existing ones.
-
Does not have access to standard application.
Login screen
To log in to the web interface, enter your login details.

Fig. 34 Web Console login
Change Password
After logging in to the platform, every user can change his password to a more fitting one using the button in the top right area of the console.
![]()
To change the current logged user password, fill in a new password and the confirmation in the change password form. A message will warn you of your action and if confirmed your password will change to the new one.
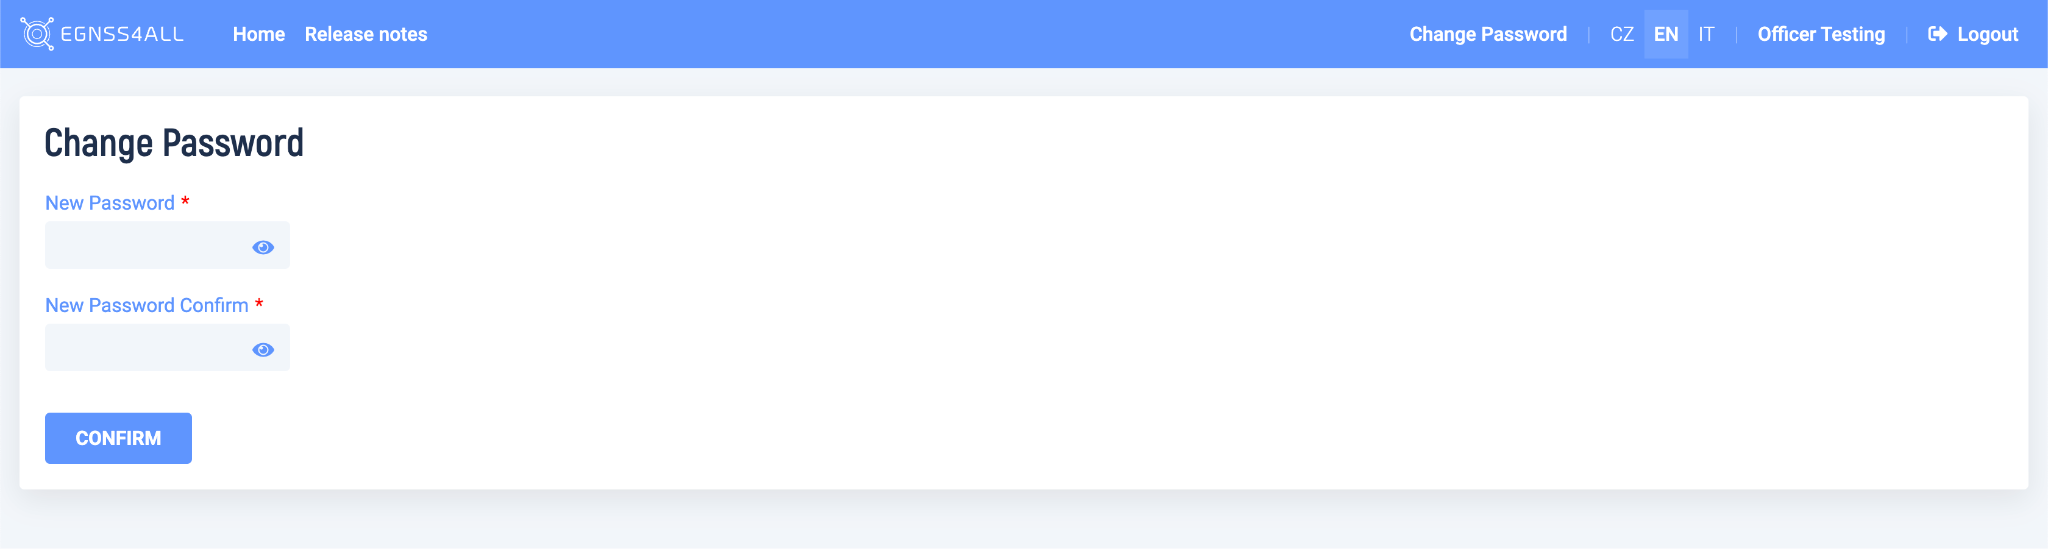
Fig. 35 Web Change Password
User access
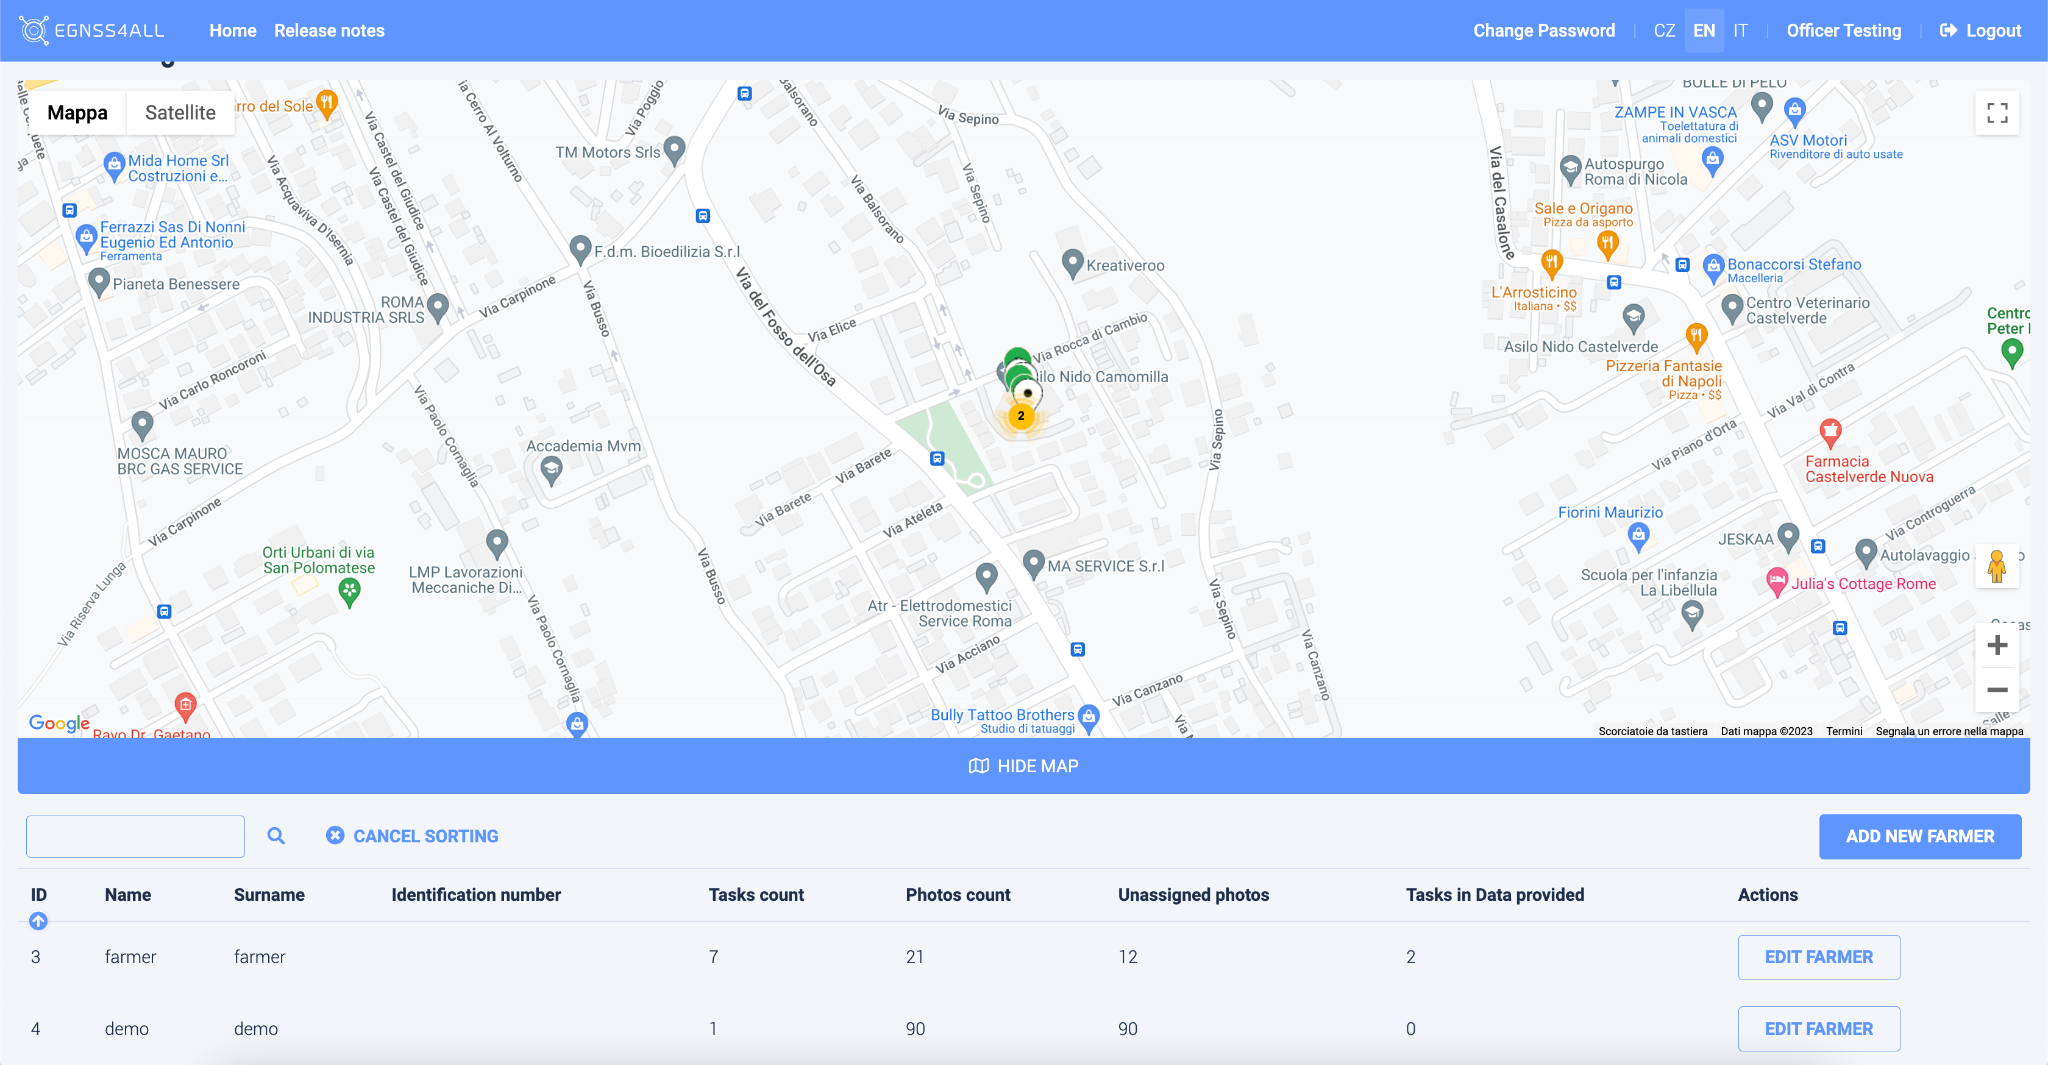
The default page after login is the Task list.
Tasks
Task List
The bottom part shows the assigned tasks, which can be sorted, filtered and searched. In the top part, points representing individual tasks are displayed on the map. Map is shown by default.

Fig.36 Tasks and Map
The following options are available for the user:
Open task detail
- (by clicking on the selected row in the list)
![]()
![]()
Search for tasks
- by the specific text
Filter tasks
- by status (by clicking on the selected status)

Sort tasks
- in a list by the selected column (by clicking on the column heading) or according to the date of completion of the task (with the button "Passed to the end")

![]()
Display a page with unassigned photos
![]()
Display a page with paths
Browse the map and open the task detail by clicking on a point on the map
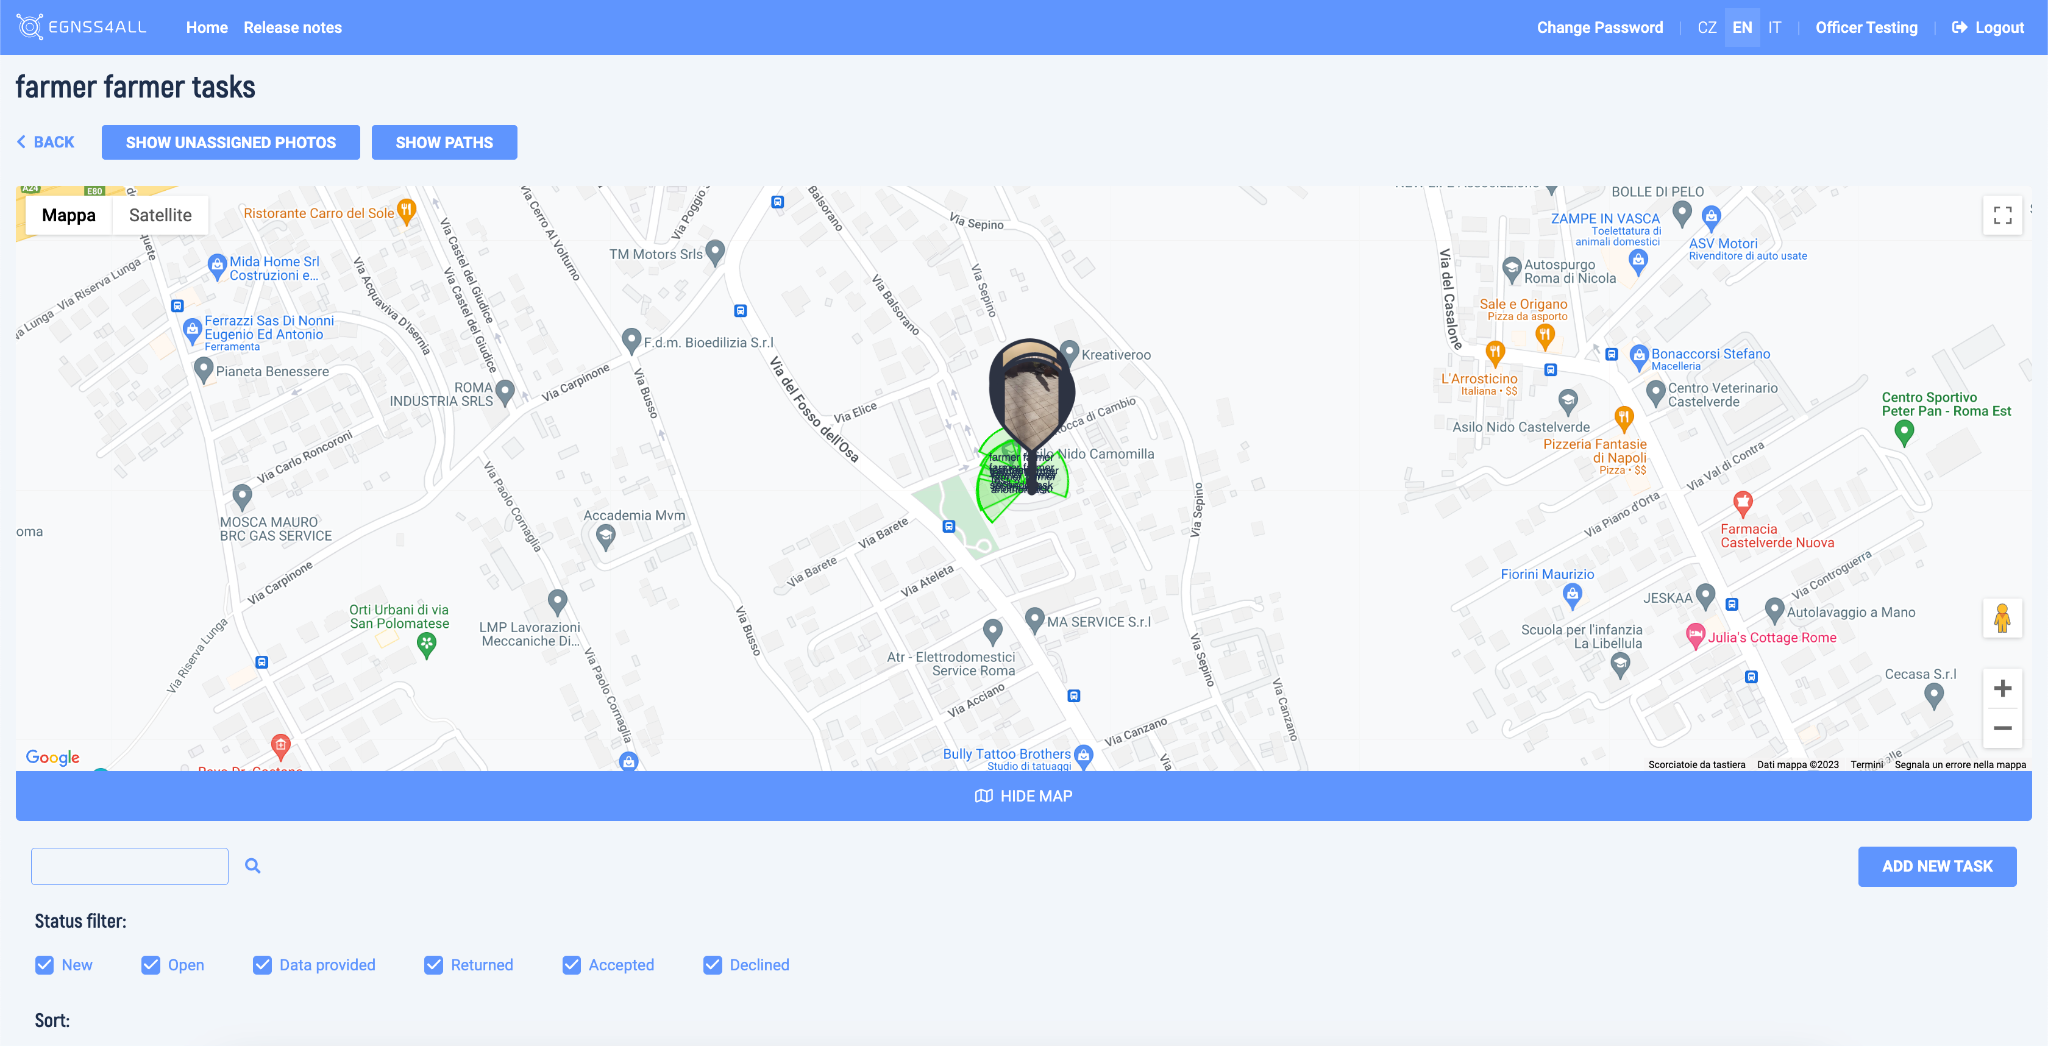
Fig. 37 Tasks Status
Task Detail page
This page contains detailed information about the task, as well as photos that were taken for the task. The map shows the position of the photos, the viewing radius of the camera and the direction of the photo.
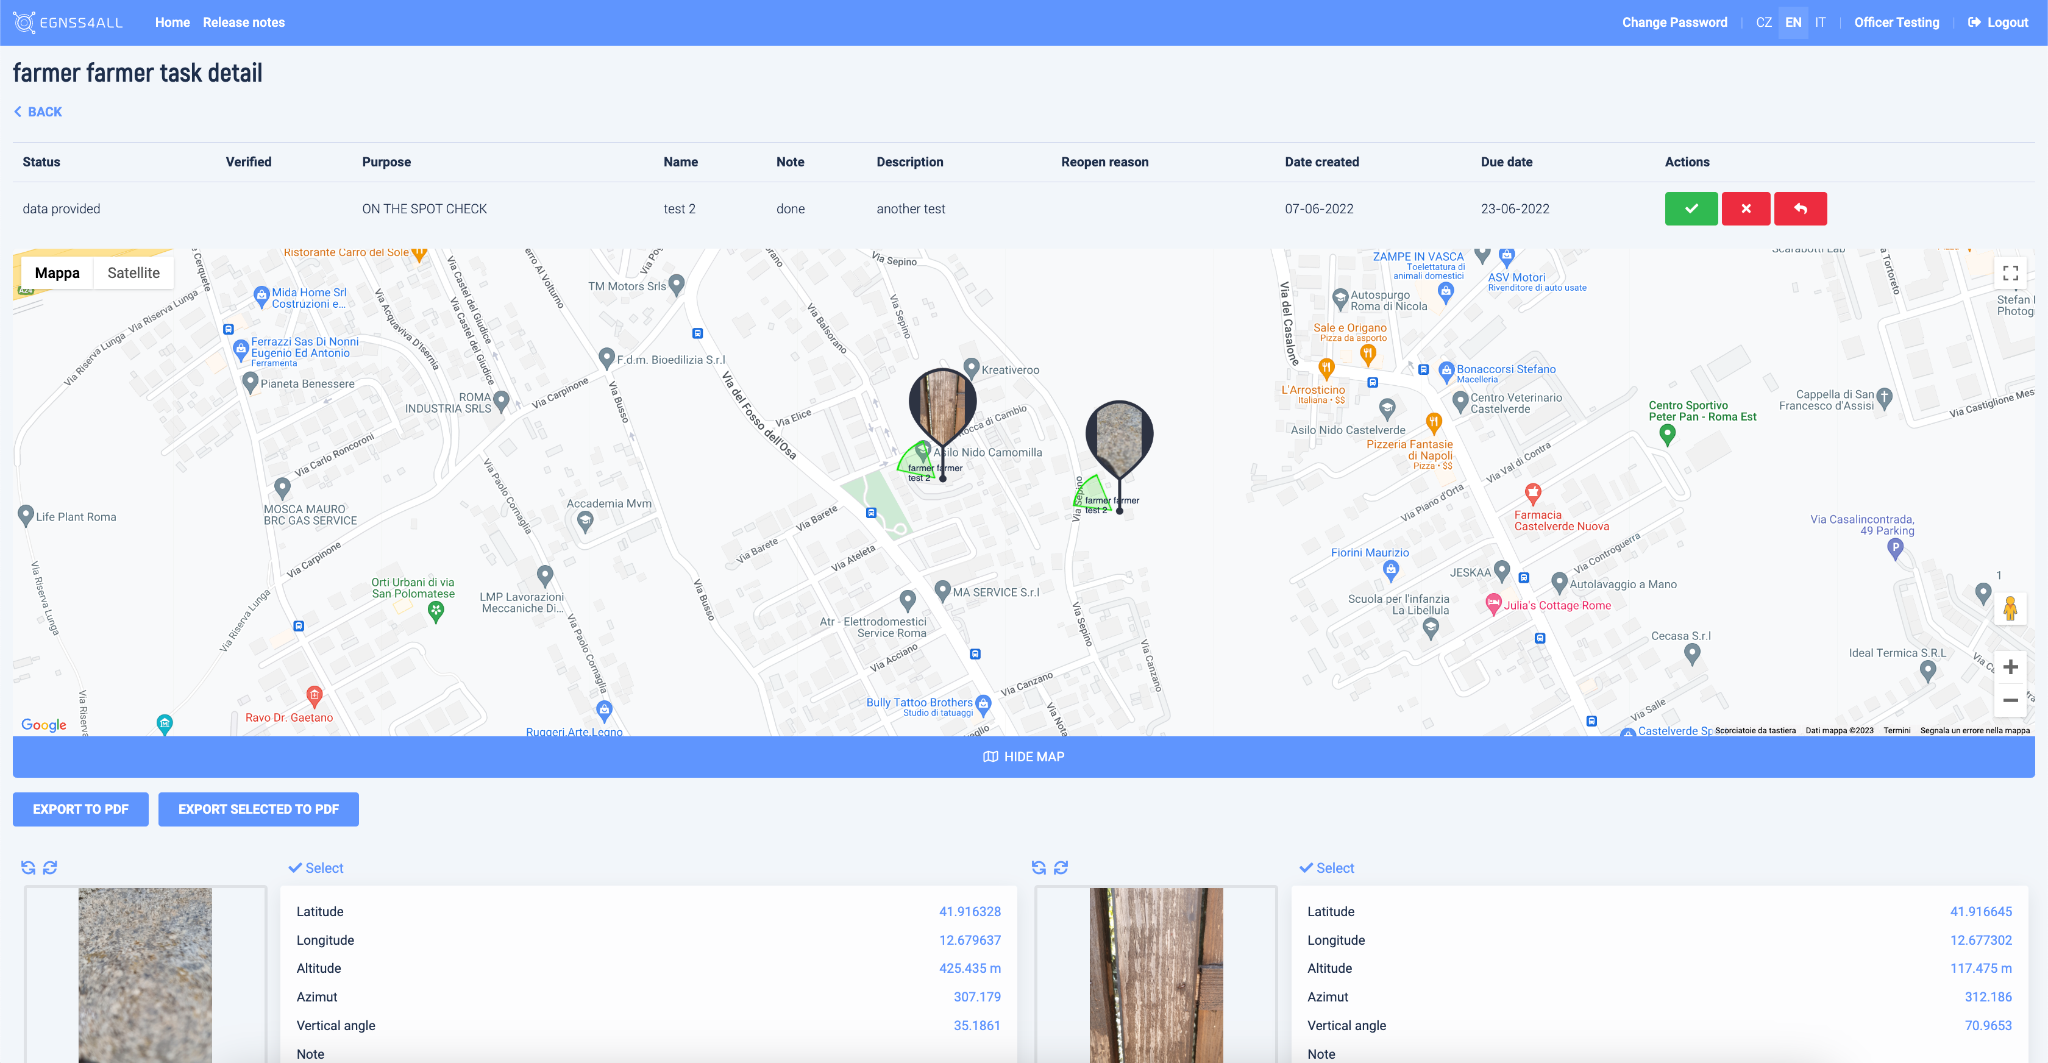
Fig.38 Task detail
Photos can be rotated
here using the buttons:
![]()
Click on the photo to open the Photo Gallery
A table with source data is placed next to each photo.
User can select photos for export to PDF
![]()

PDF export functionality is described below.
Photos
Standalone photos gallery
At the top of the page, a map is displayed, where the position of individual unassigned photos is marked.
Fig. 39 Standalone task unassigned photos
Below are photos that are not assigned to any task. A table with source data is placed next to each photo.
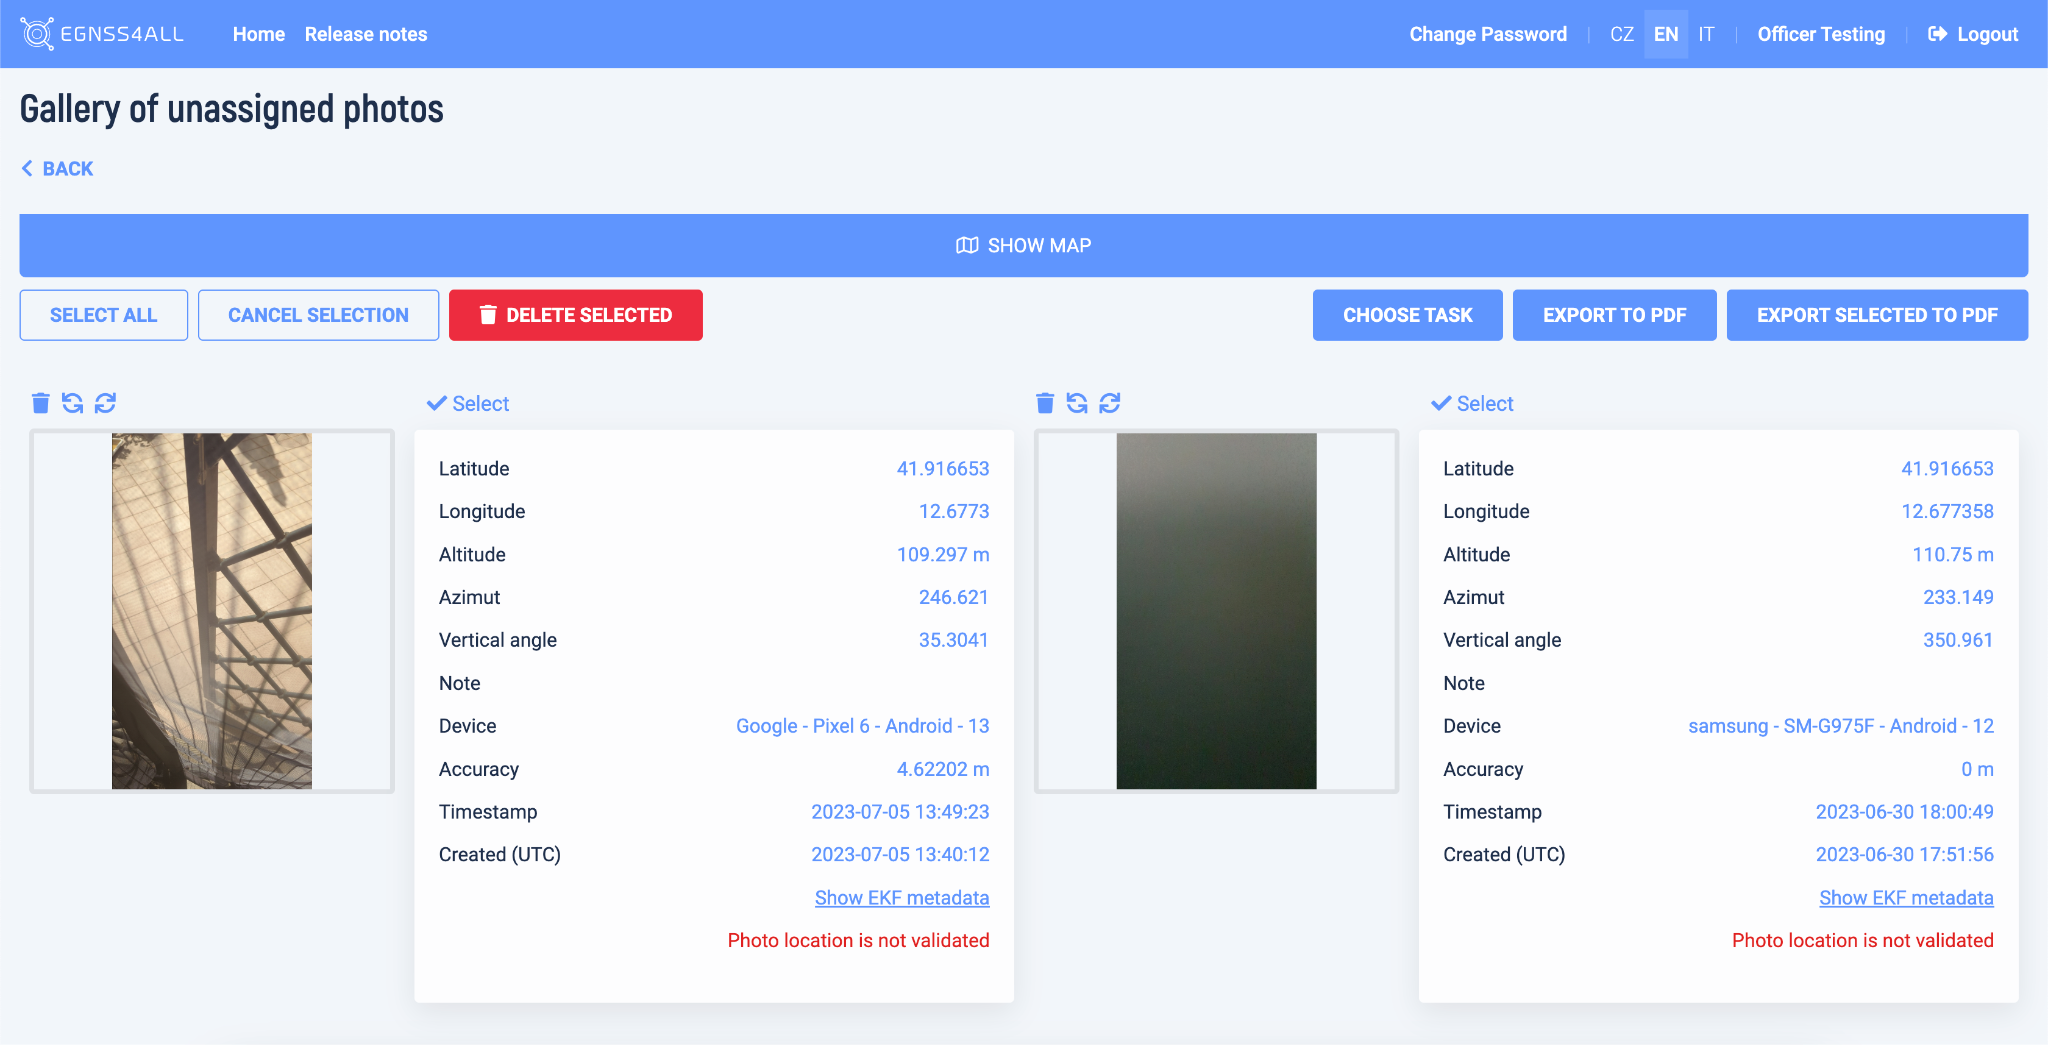
Fig. 40 Unassigned photos
Several options are available to edit the photos:
Rotation 
Delete 
Select for an action 
- By clicking the Select button, the photo is marked for the bulk assignment to a task, to a bulk delete or bulk export to PDF

- Selected photos are marked by the red rectangle. Open photo gallery – click on the photo (see below)
When selecting bulk actions, the following options are available


Select all
Selects all unassigned photos
- Cancel selection
Cancels current selection
- Choose task
Displays a page where you can select the task:
to which the selected photos are to be assigned.
For recapitulation, the photos that were marked on the previous page are displayed here.
Below the photos, a selection box is available, where it is necessary to select the target task. The map is displayed at the top of the page.
- After clicking the Confirm button, a dialog box will appear, where by pressing the OK button, the process of assigning photos will be completed.
- Once finished, the user is navigated back to the Task list screen.
Delete selected photos
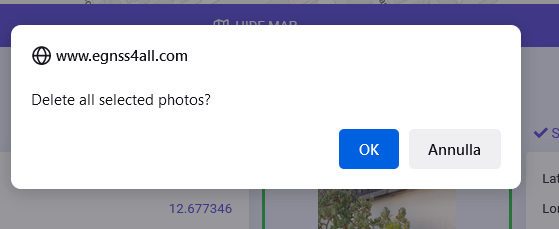
Displays a dialog box where, after confirmation by pressing OK, the marked photos will be deleted
Export all to PDF
This button pass all photos to PDF export
Export selected to PDF
This button pass selected photos to PDF export
PDF export functionality is described below.
Photo gallery
The gallery is accessible from various places in the application, always by clicking on the photo.
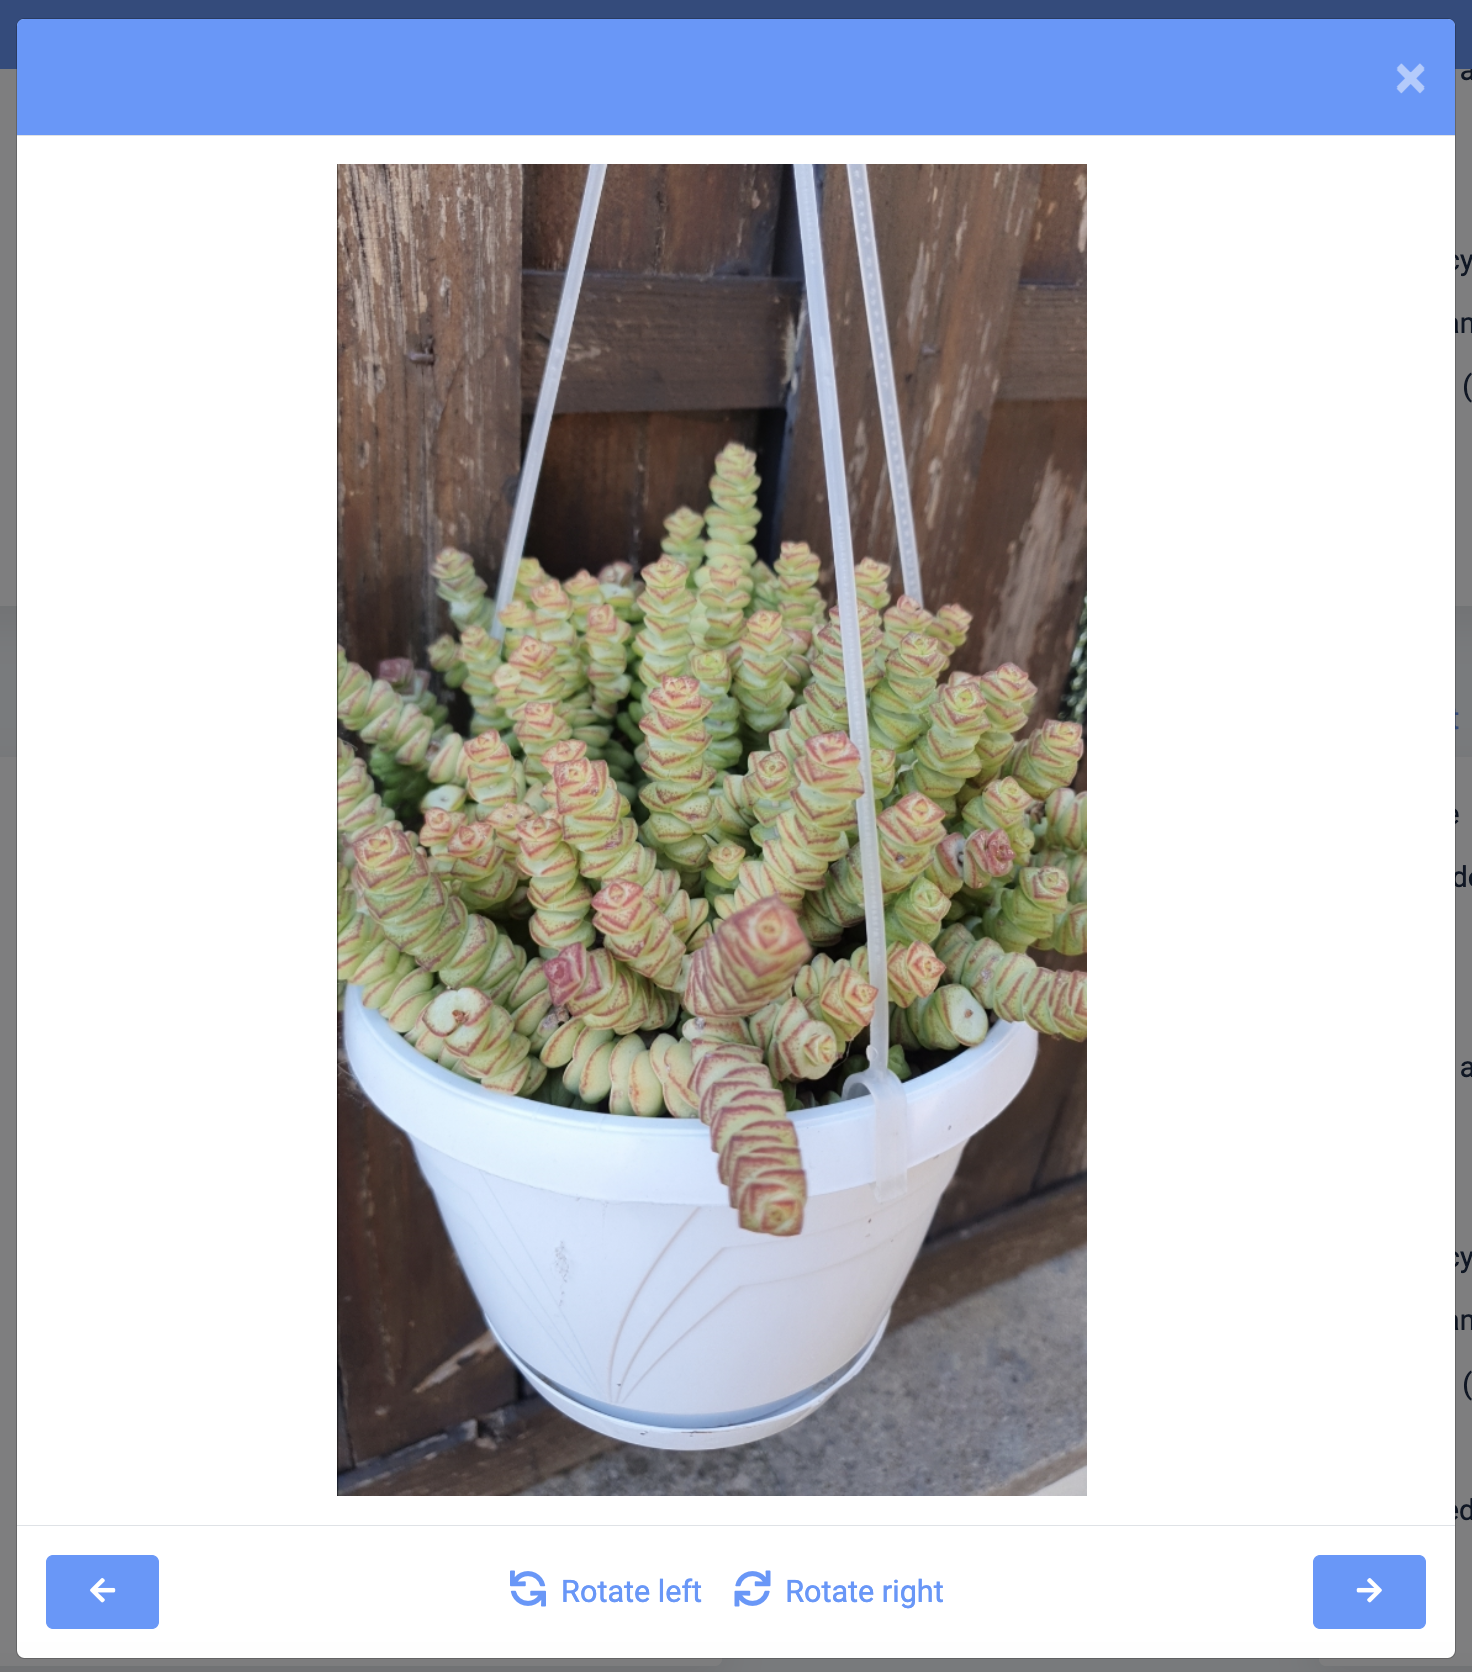
Fig. 41 Photo gallery
Control panel
At the bottom is the control panel, where you can rotate the photo and jump between photos using the arrows.
Clicking on a photo in the gallery opens a new window in which the photo is loaded in its maximum size and it is possible to
- Zoom in
- Zoom out
- Reset zoom or set the default size change is for preview only, and will not be saved.

Paths
User paths
At the top of the page, a map is displayed, where all of the paths are shown.
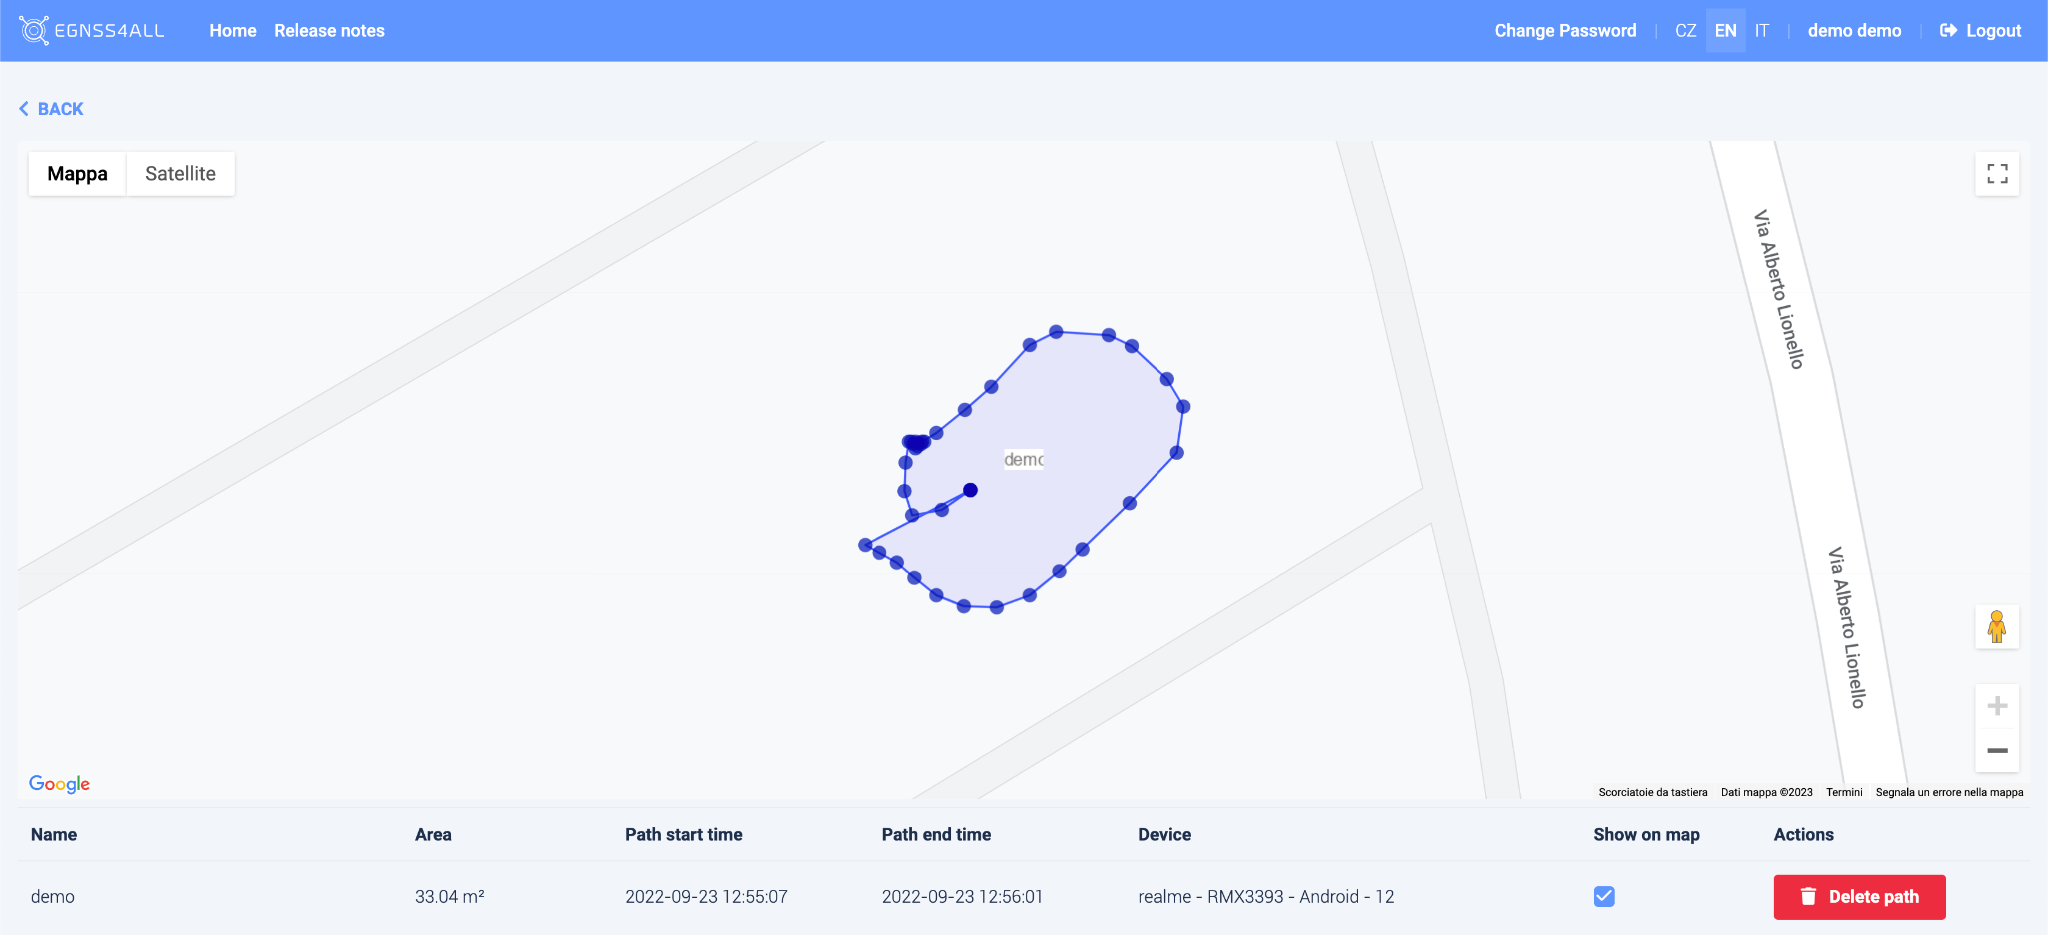
Fig. 42 User paths
Paths can be highlighted by clicking on the map. Each path has displayed points of which it is composed. Click on the point to display a table with detailed information.
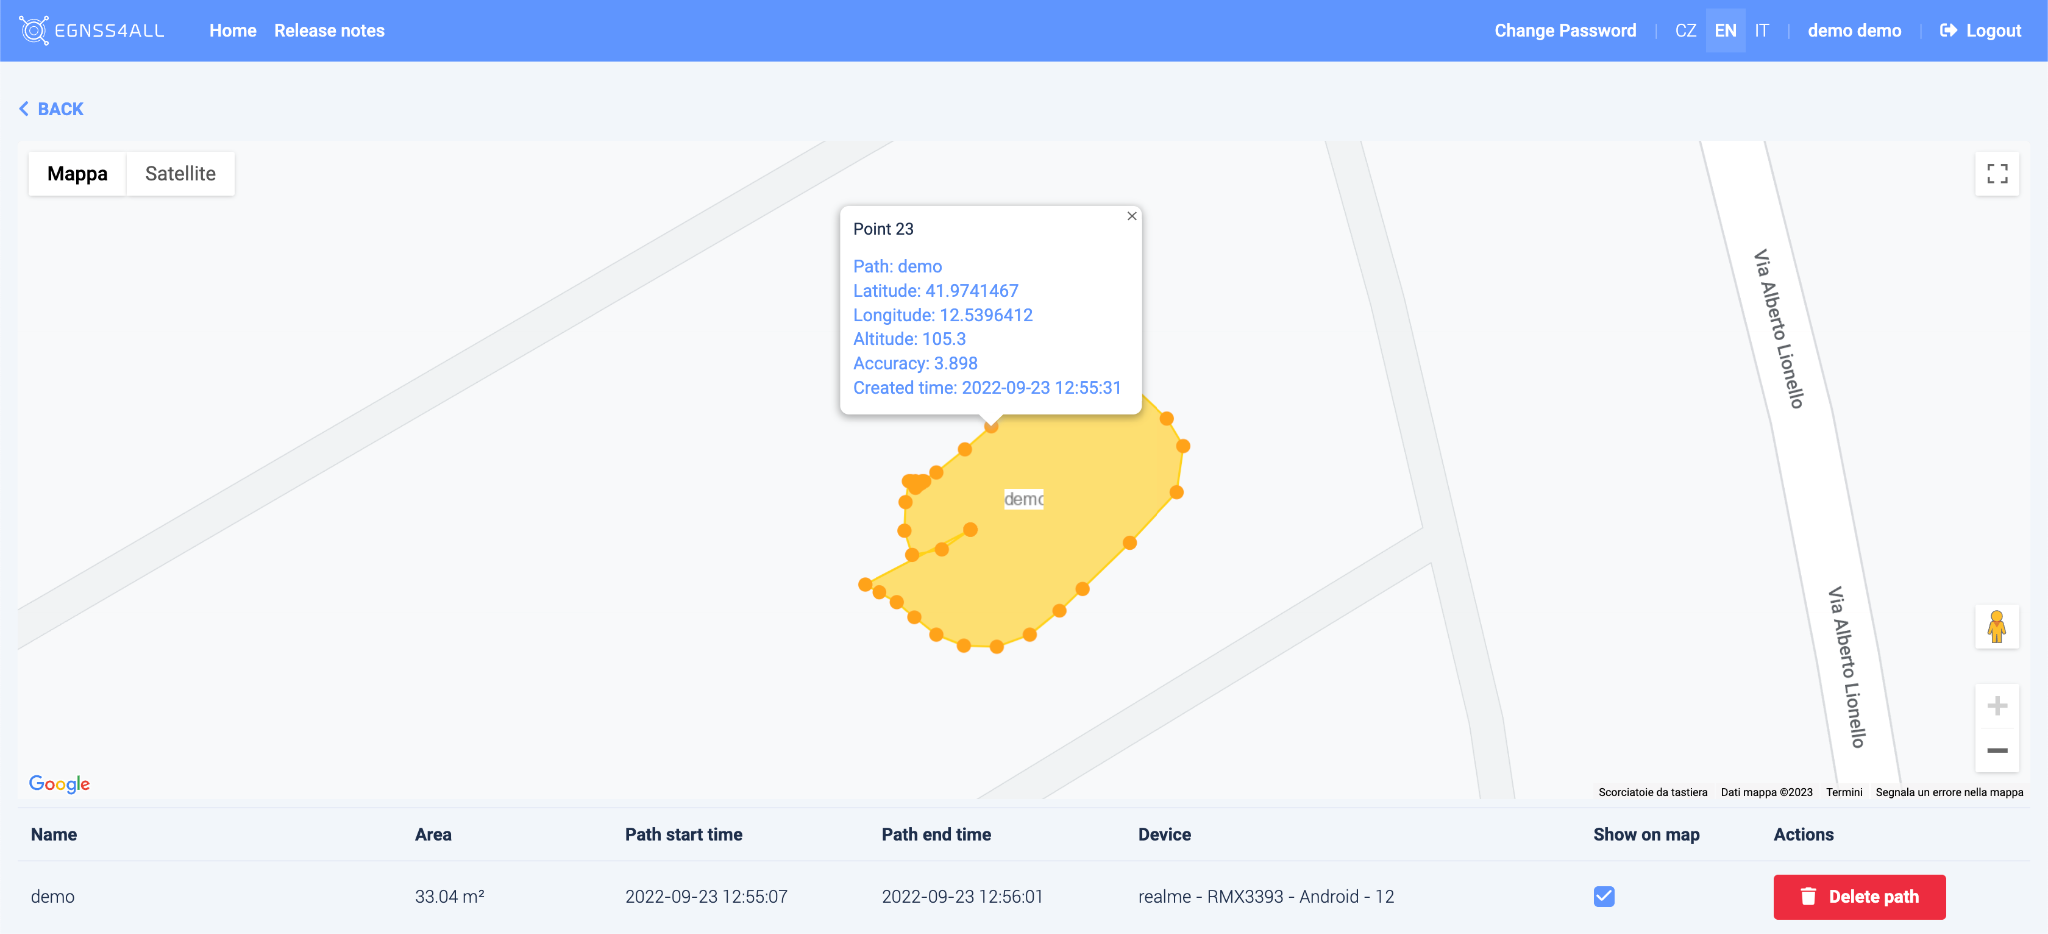
Fig. 43 Highlighted path with point detail
Below is a list of paths of the selected user. Only selected routes can be displayed on the map using the checkbox in the Show on map column.
Paths can be deleted using delete path.
![]()
Generating PDF documents
The functionality of exporting data to PDF is triggered by buttons:
The buttons are available at the Unassigned photos page and the Task detail page.
The button (Export all to PDF) passes all photos at current page to a PDF export and open a PDF prepare page.

Fig. 44 PDF generating prepare page
On the PDF prepare page are displayed all the photos which are going to be exported. Every photo has its own map generated especially for the PDF which can be adjusted before export. Once everything is prepared (progress loader disappears), export is executed by clicking the “Generate” button.
Generating PDF can take some time, which depends on total count of exported photos. The user is informed by progress loader.
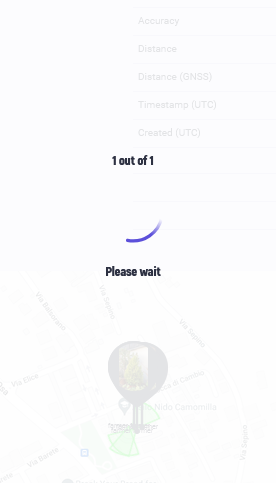
Fig. 45 Progress loader
The button “Export selected to PDF” passes to the PDF export just the selected photos:
Next steps of the exporting process are identical to process steps described above (“Export all to PDF”).
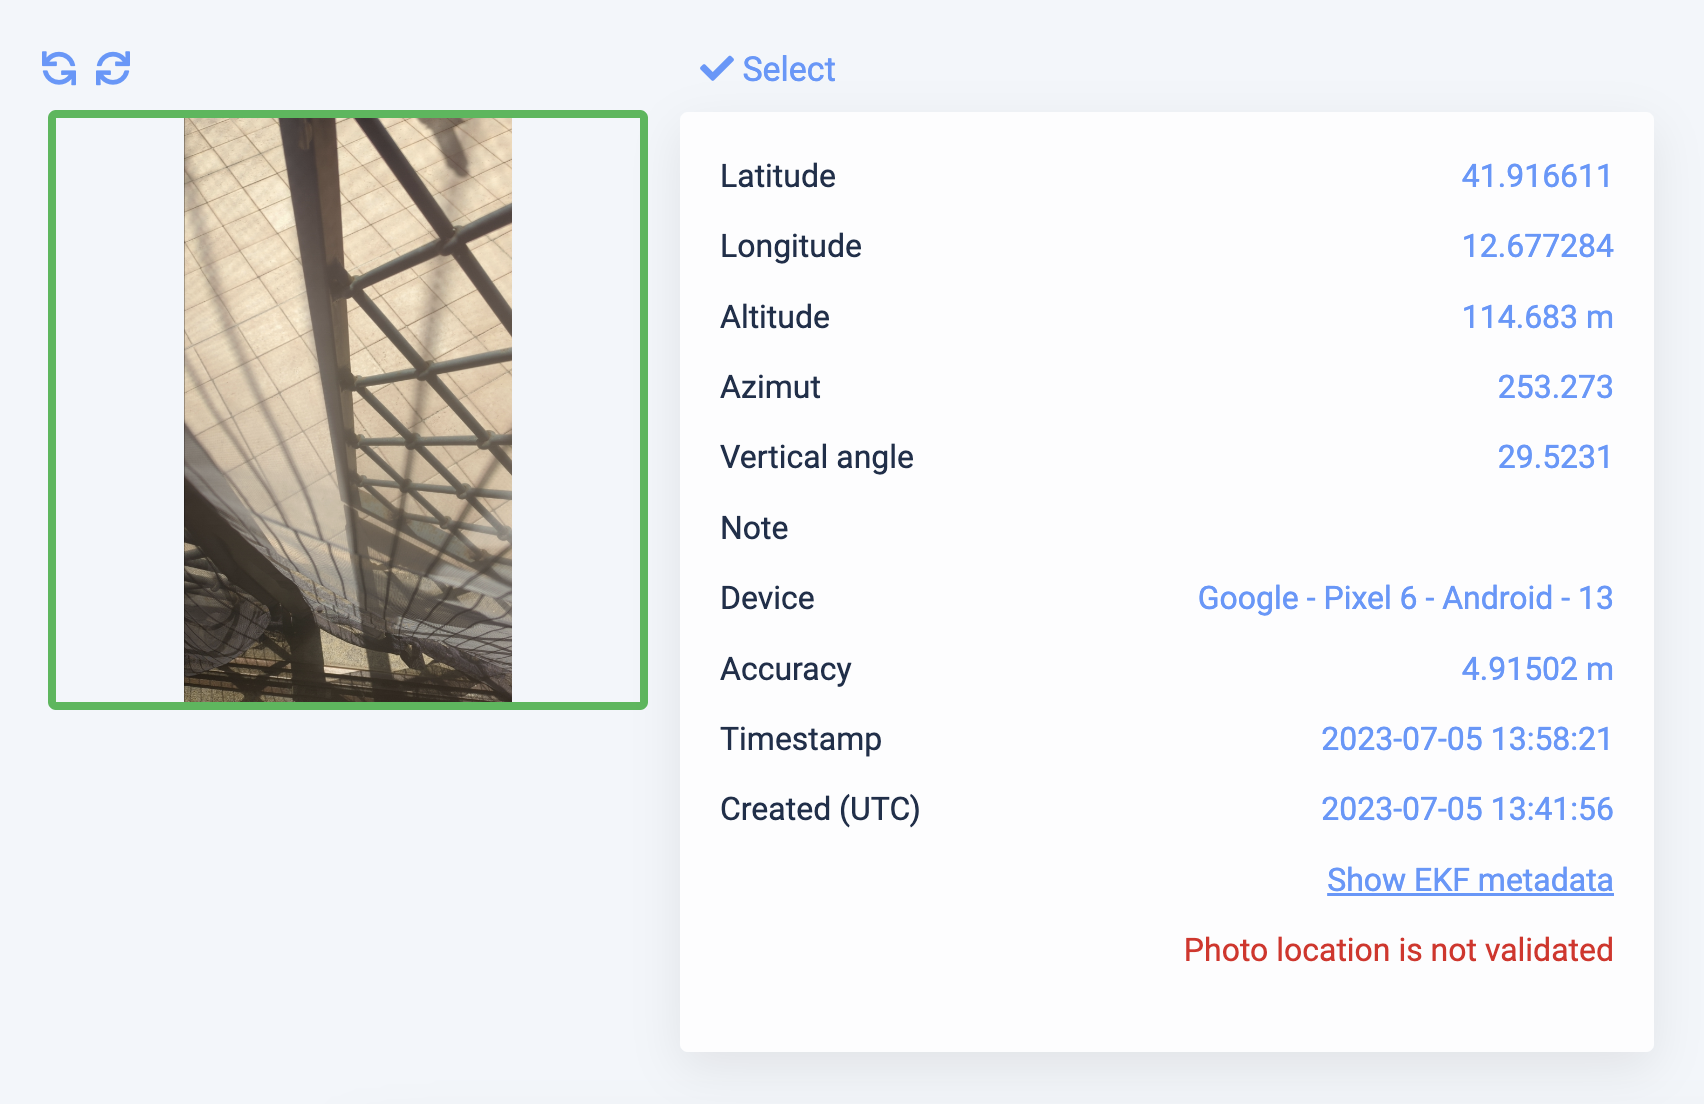
Fig. 46 Selected photo
Map view
Points that represent photos or tasks displayed on the currently open page are always displayed on the map.
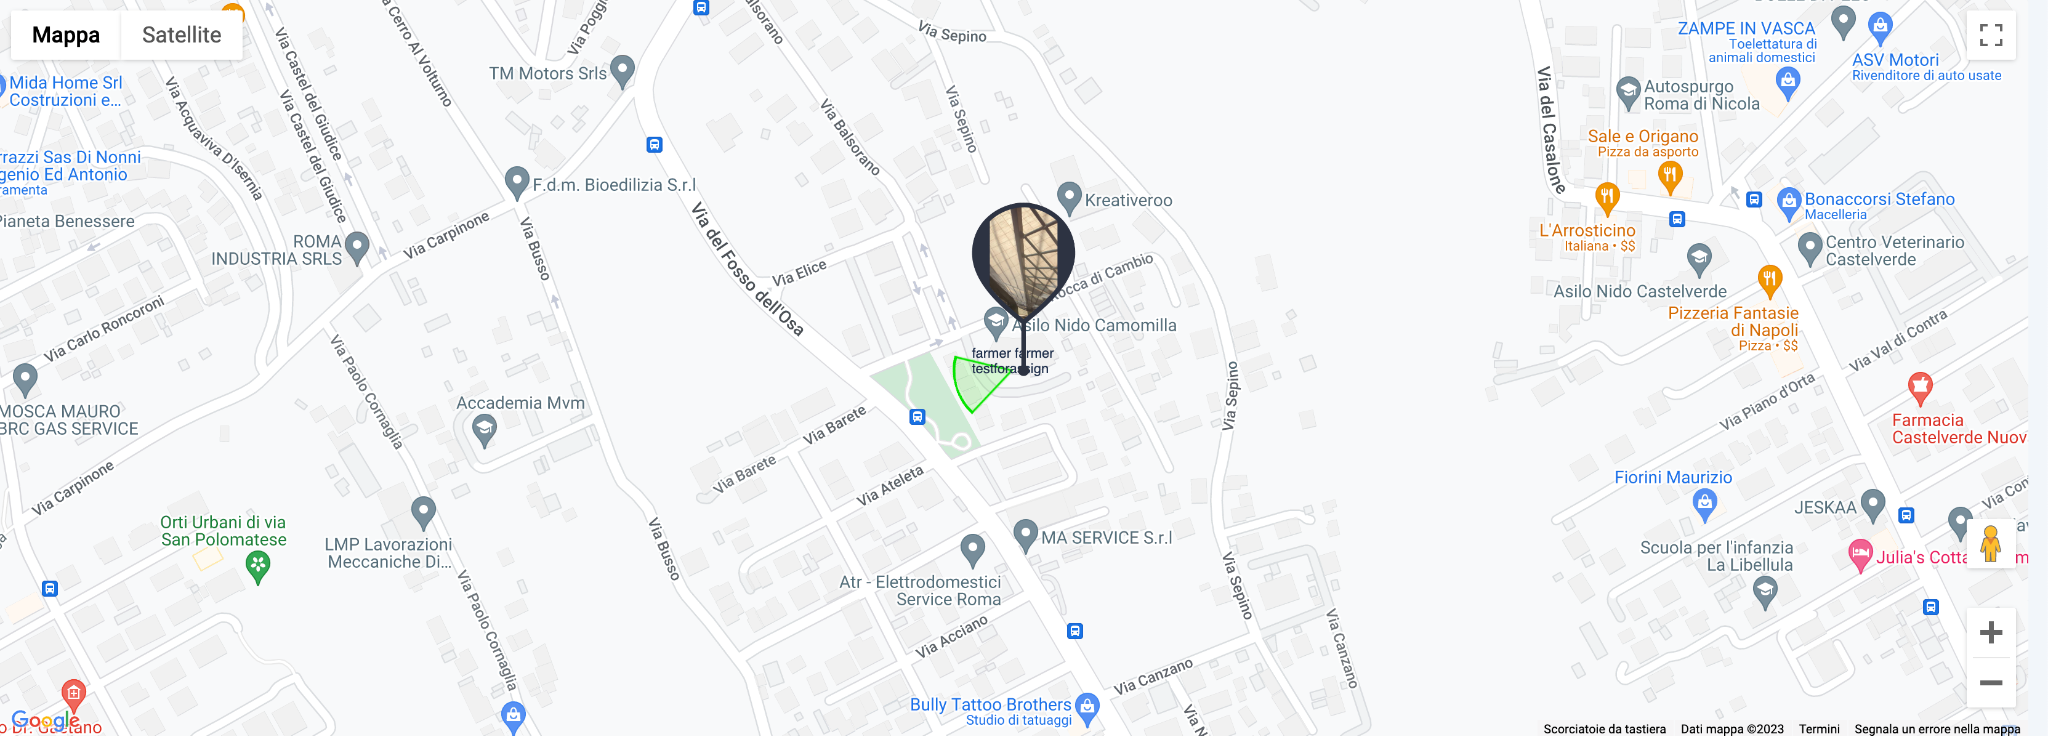
Fig. 47 Map
Zoom
- zoom of the map is automatically set so that all points are visible in the displayed area of the map
- zoom can be adjusted manually (with the mouse wheel or using the control panel on the map).
Coded markers
- points are color coded according to the active status of the task.
- Color of the points corresponds to the color of the status in the task list.
Points representing unassigned photos are not color coded.
![]()
Fig. 44 Task status list
Middle zoom
- Click on a map point to open the task detail.
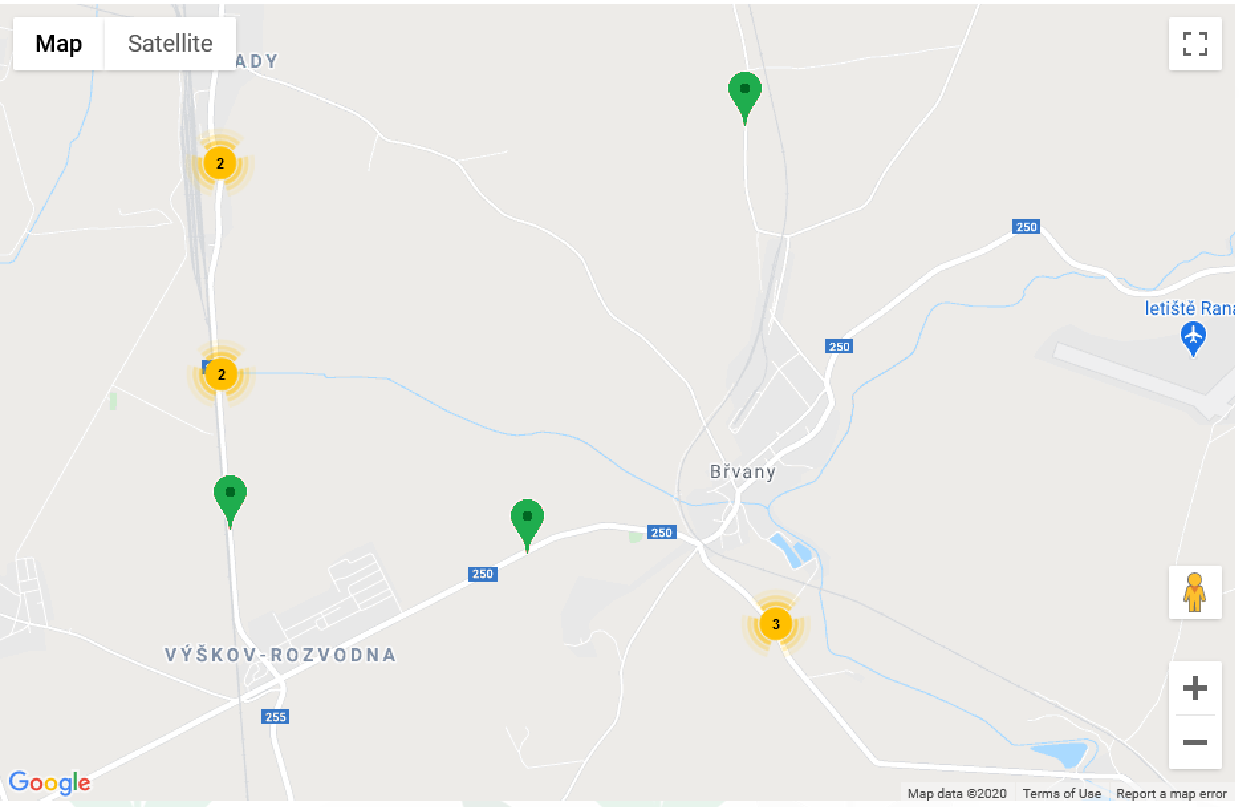
Fig. 48 Map a middle zoom
Detail zoom in
- High concentration of points in a small area, the points are grouped into one group with a numerical expression of the number of points.
-
Click on the group icon to zoom in on the group position. As you zoom in greatly on the map
- points are changed to preview banners that display :
- specific user
- name of the task
- photo and the radius of the camera view at the time the photo was taken.
- points are changed to preview banners that display :
-
Clicking on this banner opens the following task detail.
-
Polygons of existing plots and their names are also shown.
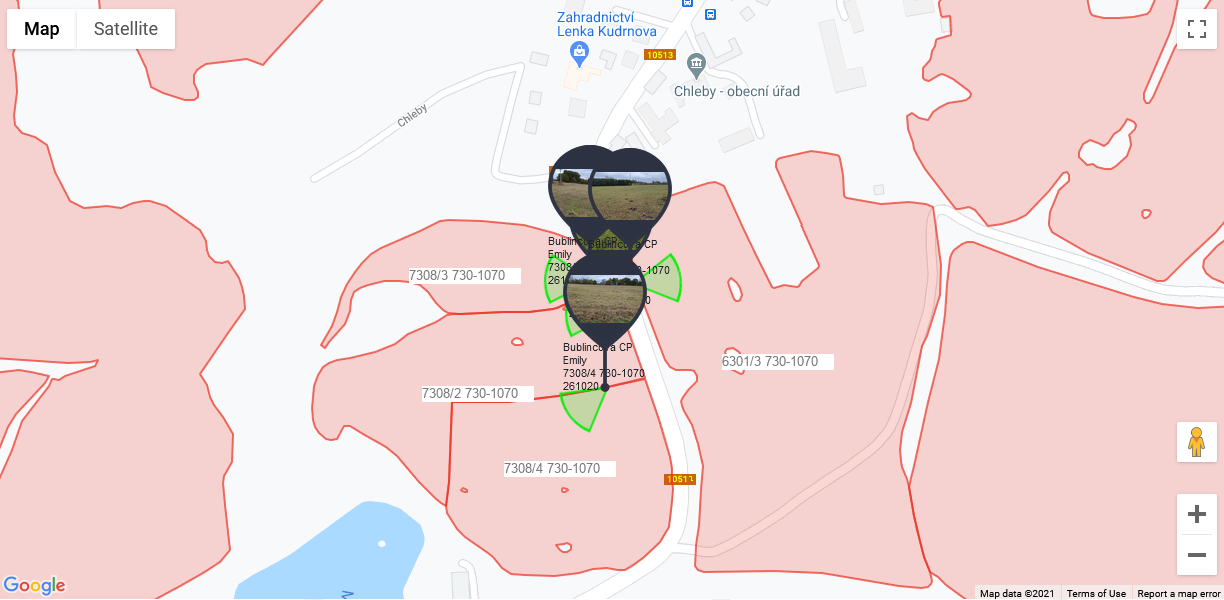
Fig. 49 Map – detail zoom in
Administrator
After logging in, the user management page is displayed.
-
Graphically and functionally, the application is the same as in the approach for users.
-
Administrator access, controls are added as described below.
User management
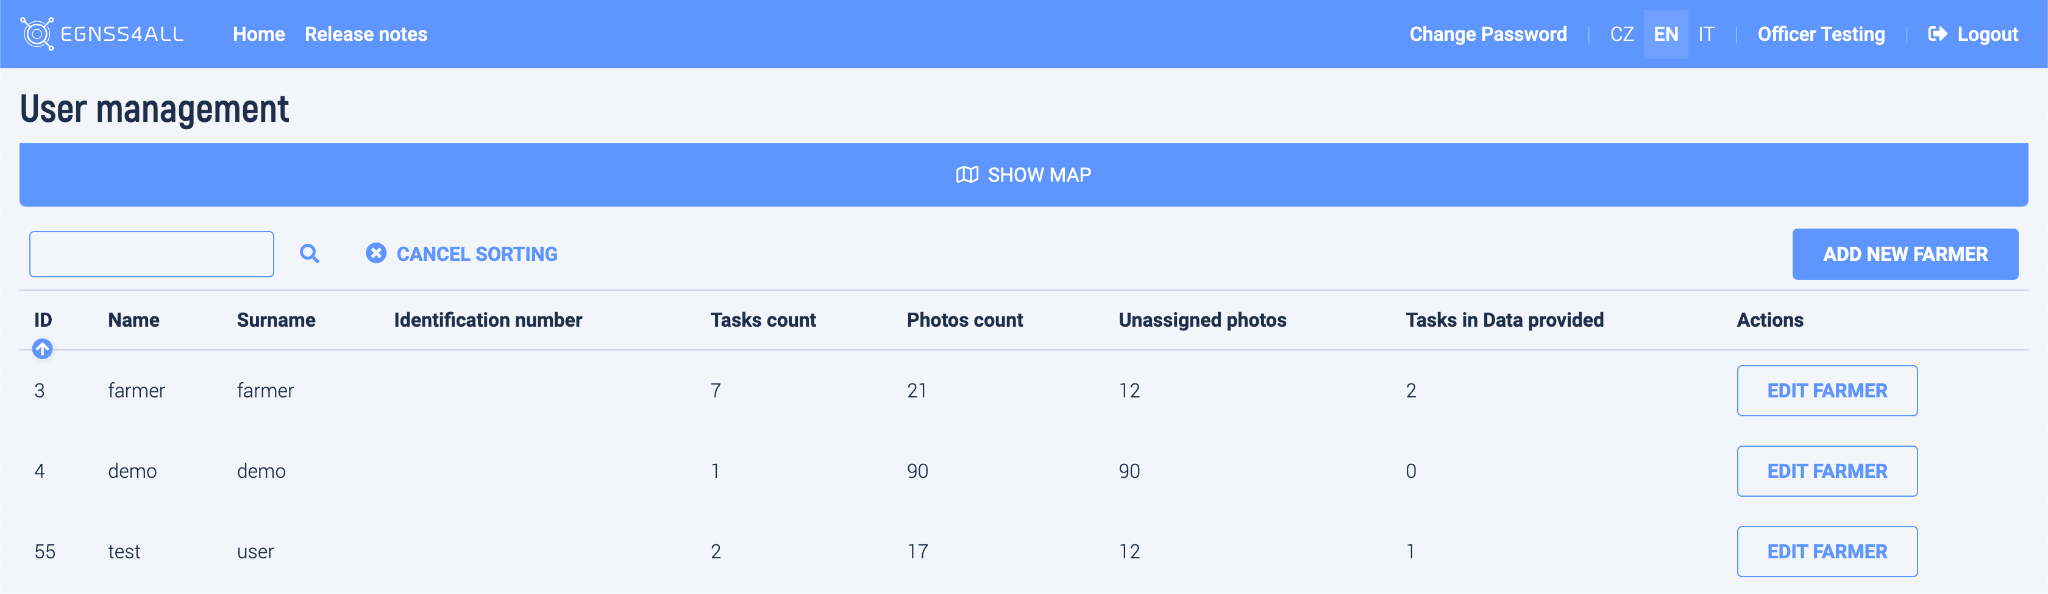
Fig. 50 User management
At the top is a map with all the tasks of all users. At the bottom is a list of users.
The following options can be used:
- Search for a user according to the entered text
![]()
- Sort users in the list by the selected column (by clicking on the column heading)

- Open user detail
![]()
-
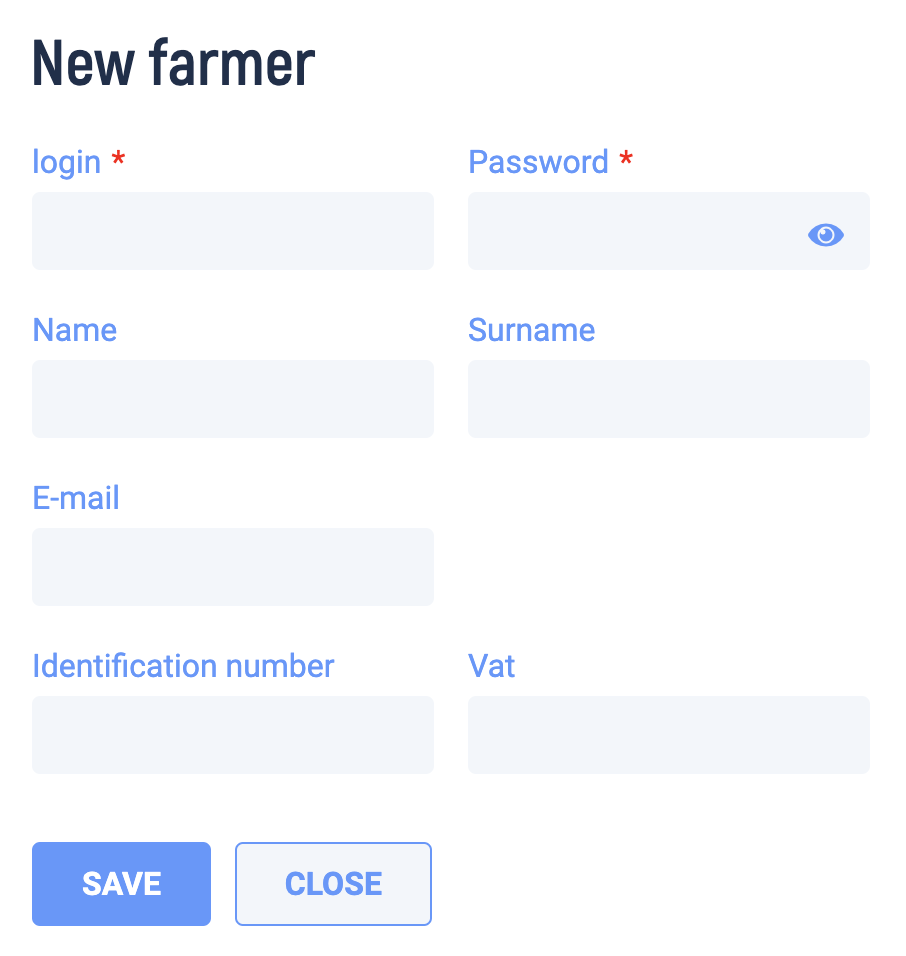
Add a new user
-
By clicking on the button, a table is displayed in which it is necessary to fill in the data of the new user
-
The creation of a new user is confirmed by pressing the Save button.
-
The entered login and password will be used by the user to access the application.
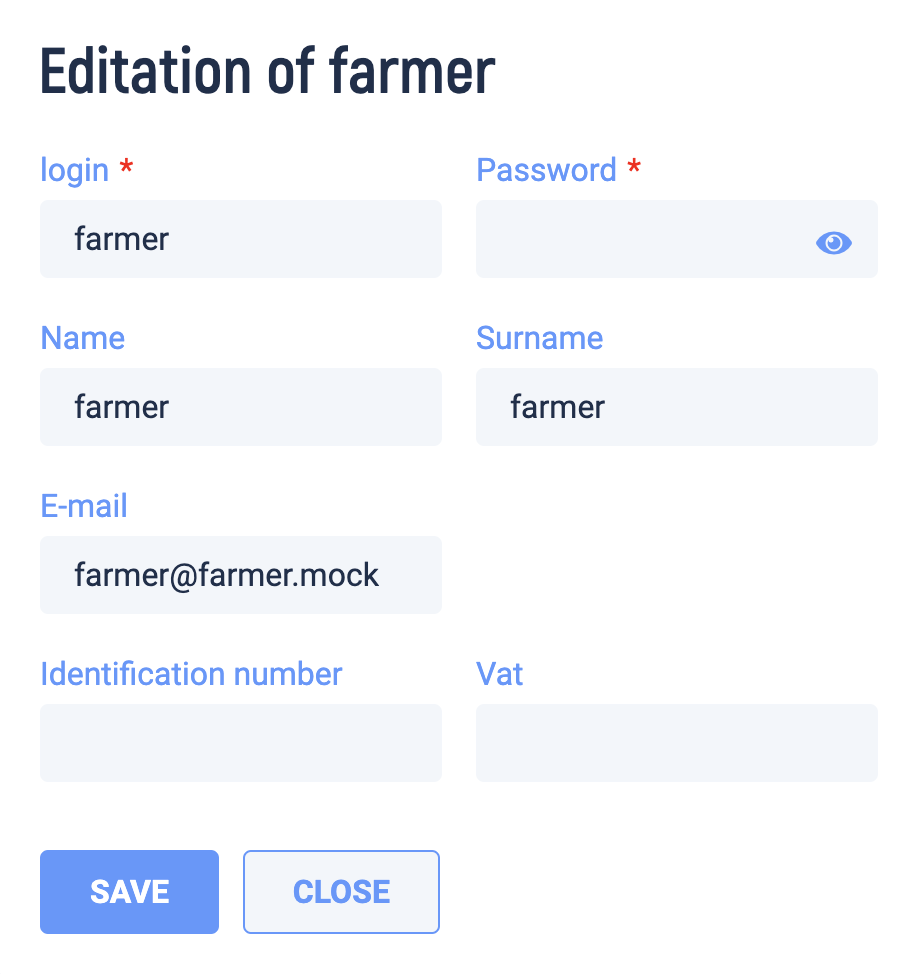
- Edit an existing user

- Clicking the button displays the same table as when creating a new user
In this case, the table is pre * populated with the data of the selected user
The data can be edited in the table (except for the login) and their modification can be confirmed with the Save button.
If the password field is left blank,the password remains the same.
User Detail
Fig. 51 Tasks Administrator
This page is the same as in the user's approach, extended by the following:
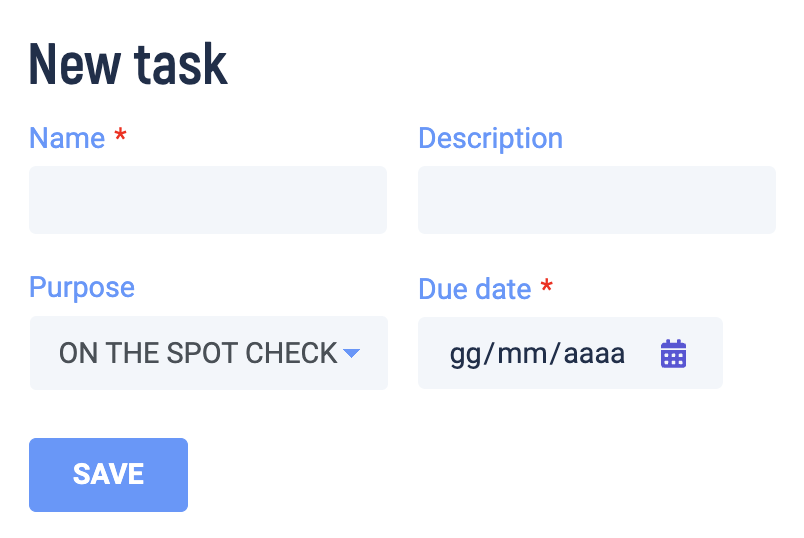
Create a new task
![]()
-
Clicking on the button displays a table in which it is necessary to fill in the data of the new task.
The creation of a new task is confirmed by pressing the Save button. -
A new task is created with the status"new"
-
Bulk task approval function
-
To perform a bulk approval, you must first mark the tasks to be approved. By checking the box for the required tasks in the right column of the table.
-
Only tasks with the status "data provided" can be approved.
-
After pressing the Approve in bulk button, a dialog box is displayed, where after pressing the OK button, the bulk action will be performed.
-
Approval of tasks changes their status to "data checked" and the acceptance status to "Approved".
-
Photos
-
The decoration Examined column graphically shows whether the photo checks were OK or not.
-
This involves checking the correctness of the position and checking the originality of the photo.
-
Complete control information is displayed in the task detail for each photo.
Task Detail
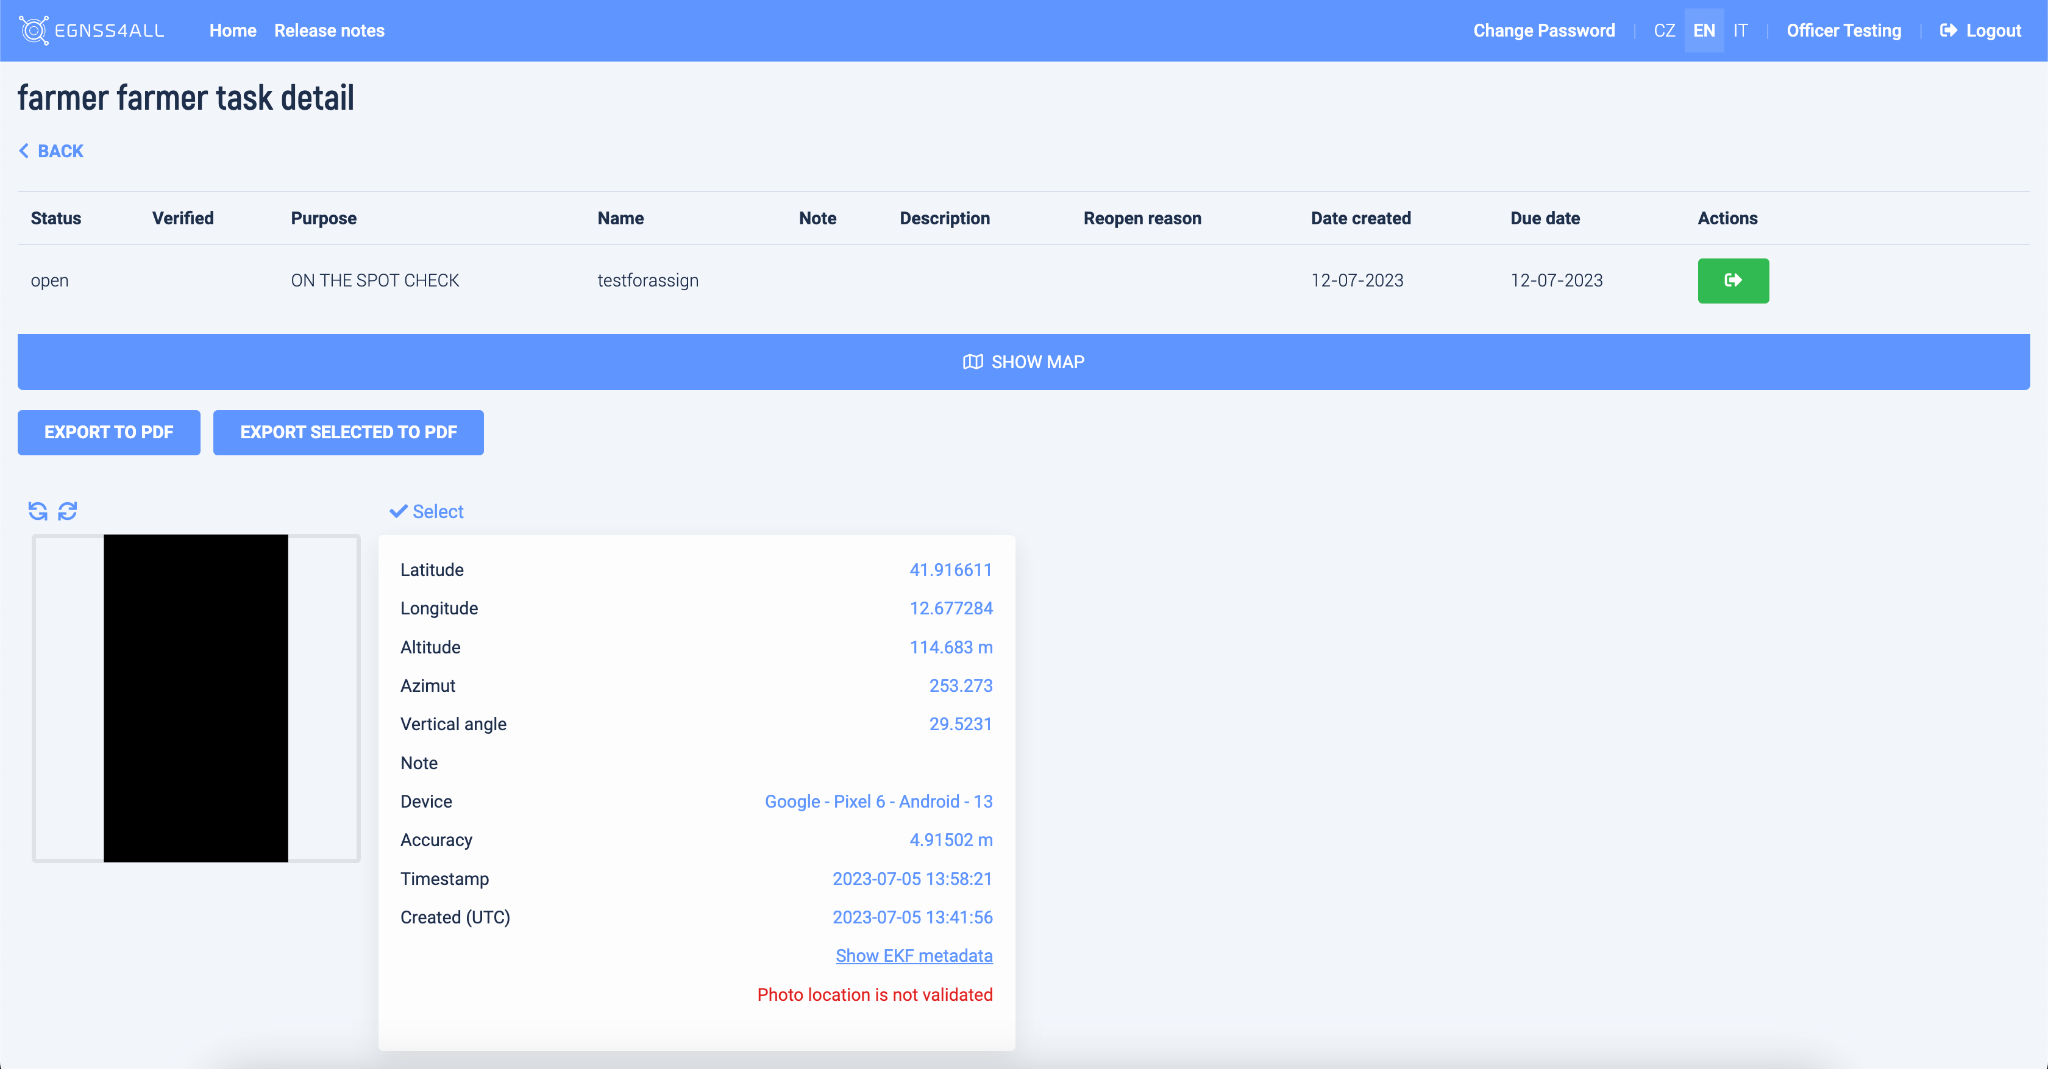
Fig. 51 Task detail – Administrator view
This page is the same as in the user's approach, extended by the following:
Task Detail Actions
-
Approve

-
"data checked"and the reception status
-
"Approved".
-
Reject

-
This action is available with the status
-
"data provided", and results in the rejection of a task.
-
After pressing theReject button, a dialog box is displayed,where it is possible to enter a comment for rejection, and after pressing OK, the action will be performed.
-
The result of the action is the setting of the status "data checked" and the acceptance status "Rejected".
-
-
Return to user

-
This action is available with the status "data provided". It allows you to return the task to the user for completion.
-
After pressing the Undo button, a dialog box is displayed, where it is possible to enter a comment to be undone, and after pressing OK, the action will be performed.
-
The result of the action is the setting of the status "returned".
-
Move to "data provided"

-
This event is available with an "open"status. It allows you to move the task to "data provided" status.
-
After pressing the Move button, a dialog box is displayed, where it is possible to enter a comment, and after pressing OK, the action will be performed.
-
The result of the action is the setting of the status "data provided".

-
Delete
-
This action is available with the status "new". It allows you to delete a task.
-
After pressing the Delete button, a dialog box is displayed, where after pressing OK the action is performed.
-
The result of the action is deleting of the task.
-
Verification of photos
-
The Examined column graphically shows whether the photo checks were OK or not.
This involves checking the correctness of the position and checking the originality of the photo. -
View complete photo review information
-
The table of photo data shows the results of the performed checks in color.
Super-administrator
After logging in, the Agency management page is displayed.
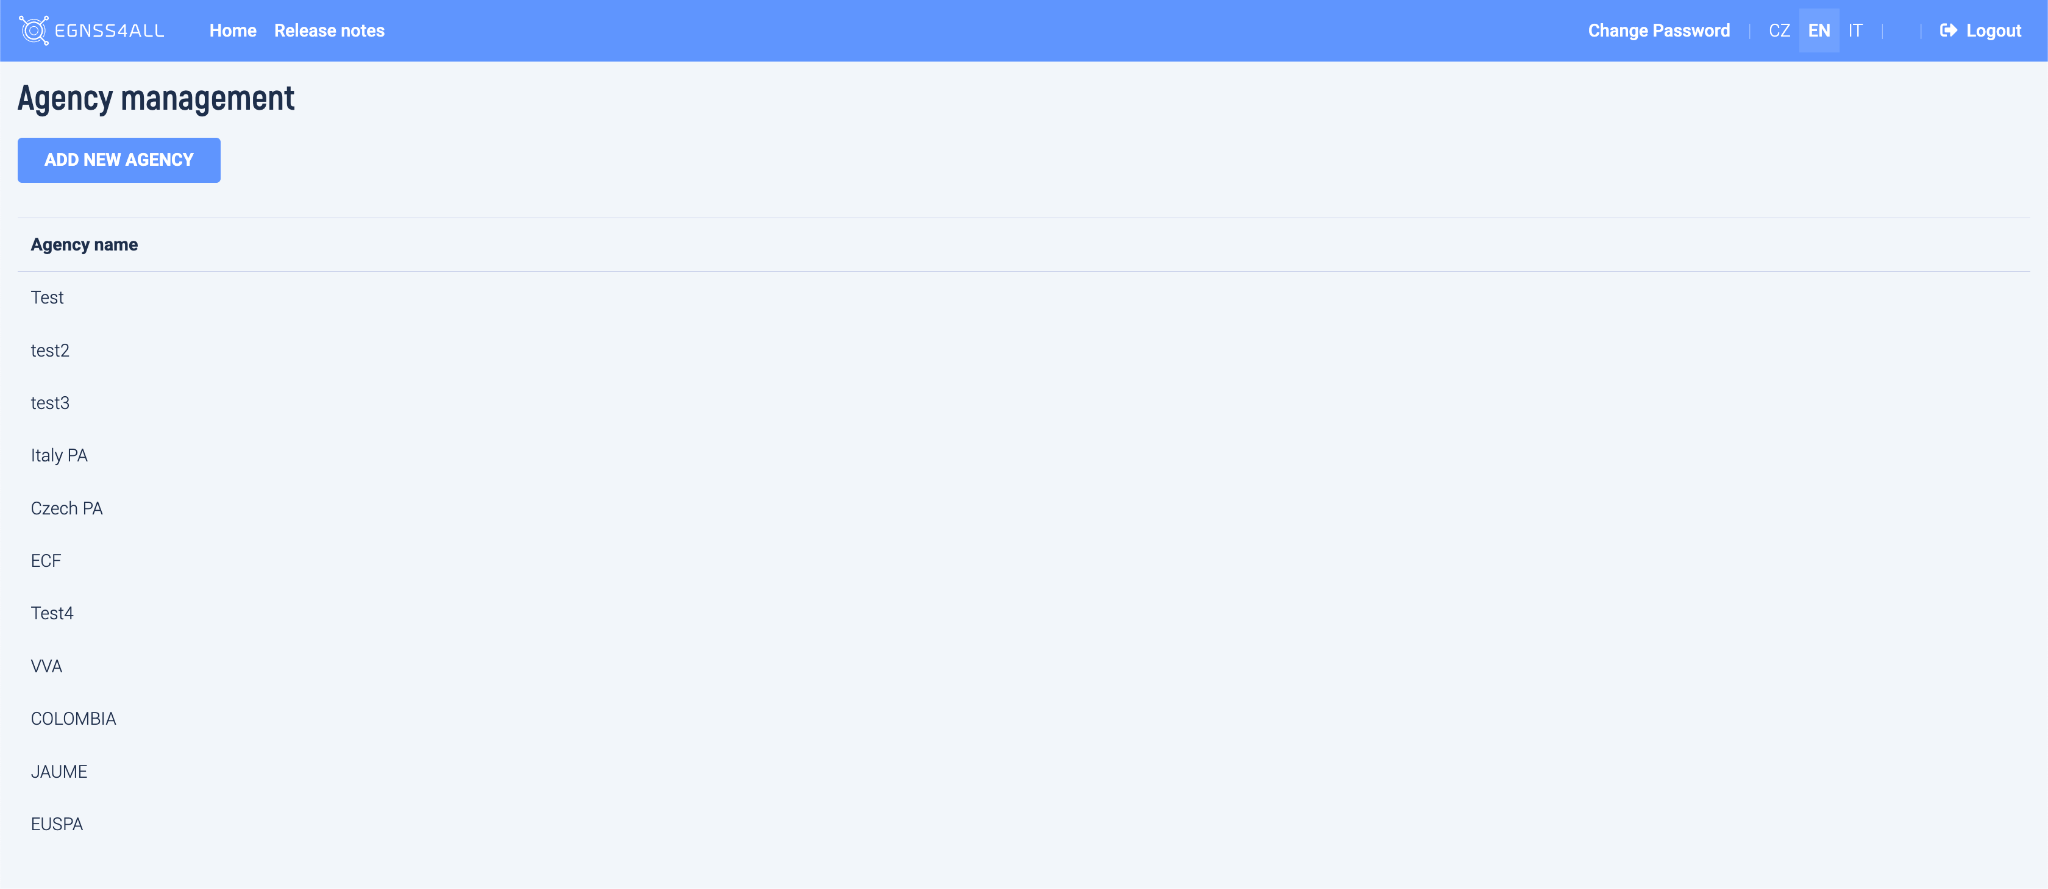
Fig. 53 Agency management
Agency list
This page offers the following features:
- Add new agency
![]()
- Clicking on the button displays a table in which it is necessary to fill in the name of the new agency. The creation of the agency is confirmed by pressing the Save button.

Open detail of the agency by clicking on a row of specified agency.
![]()
Agency detail
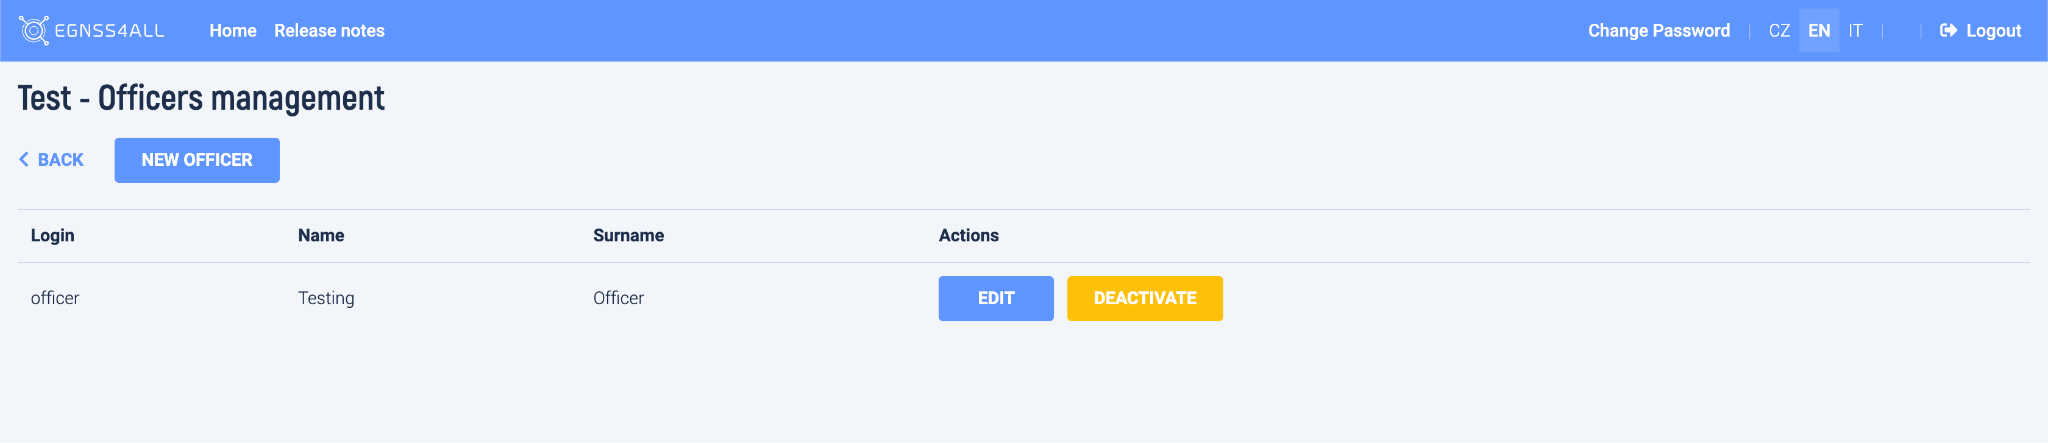
Fig. 54 Officers management
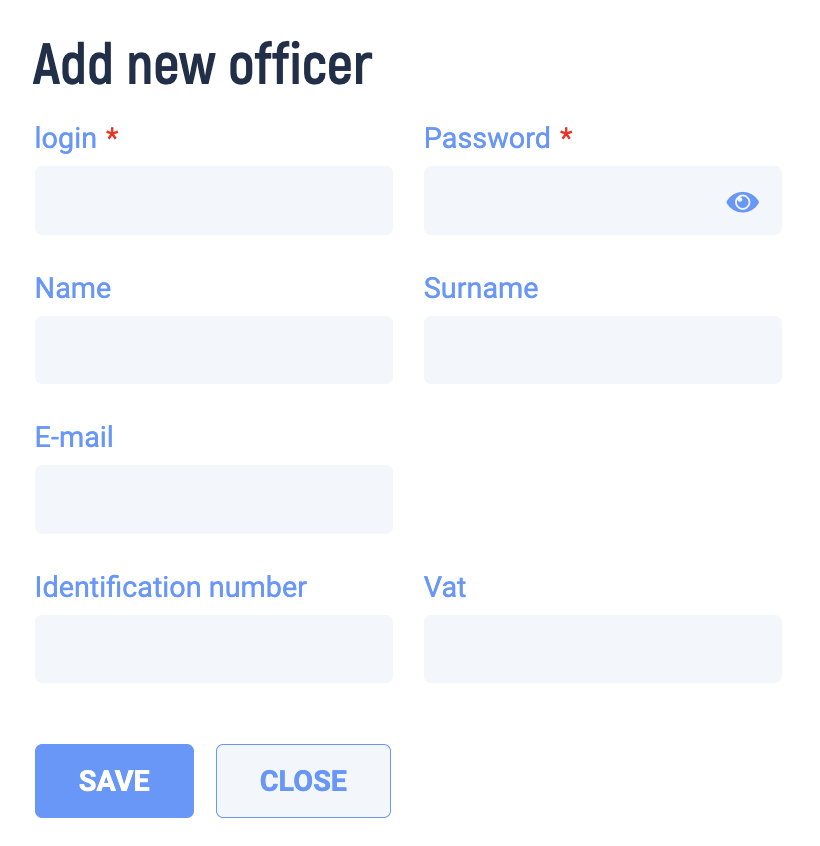
Add a new officer

-
By clicking on the button, a table is displayed in which it is necessary to fill in the data of the new officer. The creation of a new officer is confirmed by pressing the Save button.
-
The entered login and password will be used by the user to access the application.
Edit an existing officer
![]()
-
Clicking the button displays the same table as when creating a new officer. In this case, the table is pre * populated with the data of the selected officer. The data can be edited in the table (except for the login) and their modification can be confirmed with the Save button.
-
If the password field is left blank,the password remains the same.
Deactivate an existing officer
![]()
-
After pressing the Deactivate button, a dialog box is displayed, where after pressing OK the action is performed.
-
The result of the action is deactivation of the selected officer.
-
The deactivated officer will be no more able to log in into application.
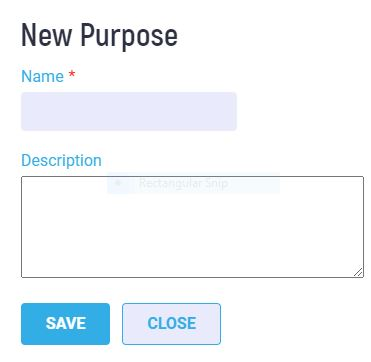
Create new purpose
![]()
- Clicking on the button displays a
table in which it is necessary to fill in the data of the new purpose.
The creation of a new purpose is confirmed by pressing the Save button.
Edit an existing purpose
- Clicking on the button displays a
table in which it is necessary to fill in the data of the edit purpose.
Edit purpose property is confirmed by pressing the Save button.

Deactivate an existing purpose
![]()
-
After pressing the Deactivate button, a dialog box is displayed, where after pressing OK the action is performed.
-
The result of the action is deactivation of the selected purpose.
Appendix A: Hosting and installing the web console
Hosting requirements
- Php7 engine
- MySQL 8 database server
- Apache2 webserver
Server resources requirements
- min 8GB RAM
- min 2 core cpu
- min 10GB disk space
Installation steps for the webconsole
copy the web console files into the selected webroot directory create VirtualHost section in the Apache2 configuration and point it to selected directory make sure that there is set a directive DirectoryIndex index.php
write the database name, database user and the corresponding password into the web console configuration file _includes.php
switch (SERVER) {
  case 'UAT':
    define('SYSTEM_HOST', '<https://mybohostname>');
    define('DB_TYPE', 'mysqli');
    define('DB_HOST', 'localhost');
    define('DB_USER', 'root');
    define('DB_PASSWORD', 'xxxx');
    define('DB_SCHEMA', 'egnss4all');
    break;
 case 'LOCALHOST':
    define('SYSTEM_HOST', '<https://mybohostname>');
    define('DB_TYPE', 'mysqli');
    define('DB_HOST', 'localhost');
    define('DB_USER', 'xxxx');
    define('DB_PASSWORD', 'xxxx');
    define('DB_SCHEMA', 'egnss4all');
    ini_set('display_errors', 0);
    break;
}
Appendix B: Developer Documentation
Technologies
- OOP PHP (Object * Oriented Programming)
- TWIG templates
- MySQL database
- DIBI framework for DB query
- HTML, CSS, Javascript
- Bootstrap 4.4.1 framework, jquery framework
- Google maps API
- MPDF framework for generating PDF
- html2canvas.js plugin
Classes description
- Index
- managing farmers
- loading farmer list and tasks
- login
- login user
- logout user
- verifying users
- task
- adding tasks
- loading task info and photos
- accepting, declining and deleting tasks
- changing task status
- loading photos and photos metadata
- loading shapes
- assign unassigned photos to task
- generating PDF
- user
- managing users and roles
- loading the unassigned photos and tasks of users
- managing photo rotation
Structure
- CSS
- cascade styles for web pages
- ENGINE
- framework and classes
- FONTS
- fonts for web pages
- IMG
- images for web
- JS
- javascript files for web and map
- PHOTOS
- photos downloaded from phones
- TEMPLATES
- TWIG templates for web
- VENDOR
- frameworks
Web Services and Database
Below is a technical overview of the implemented web services for the PIC2BIM application and their features.
Installation Web Services
https://github.com/buildvoc/EGNSS4ALLSERVICES
- Install PHP version 8, enable GDI module in PHP
- Install Apache2
- Install MySql Database following instructions on https://github.com/buildvoc/EGNSS4ALLDATABASE
- Copy project files in a web accessible directory of Apache
- Modify the file engine/db_fx.php accordingly to your MySql database setup
- Create a writable by apache directory named "photos4all" on the same level of the project main path
Installation Database
- Install MySql database 8
- Create a Database named "egnss4all"
- Import sql file into mysql to init database
check user by login and pswd
https://pic2bim.co.uk/egnss4allservices/comm_login.php
- input
- HTTPS, POST
- parameters
- login – string(255)
- pswd * string(255)
- output
- JSON
- status – string * ok/error
- error_msg – string – error message if an error occurs
- user – number – user ID for login, if exists
sends geometry shapes for rectangle
https://pic2bim.co.uk/egnss4allservices/comm_shapes.php
- input
- HTTPS, POST
- parameters
- max_lat – float
- min_lat – float
- max_lng – float
- min_lng – float
- output
- JSON
- status – string * ok/error
- error_msg – string – error message if an error occurs
- shapes – array
- identificator – string – shape identificator
- wgs_geometry – json – geometry of shape
sends photos for task or user
https://pic2bim.co.uk/egnss4allservices/comm_task_photos.php
- input
- HTTPS, POST
- parameters
- task_id – number – task identificator
- user_id – number – user identificator
- output
- JSON
- status – string * ok/error
- error_msg – string – error message if an error occurs
- photos – array
- note – string – user note
- lat – float – latitude of photo
- lng – float – longitute of photo
- photo_heading – number – photo azimuth
- created – datetime – date and time of photo creation
- photo – string – base64 encoded photo
- digest – string – hash of photo
sends tasks for user
https://pic2bim.co.uk/egnss4allservices/comm_tasks.php
- input
- HTTPS, POST
- parameters
- user_id – number – user identificator
- output
- JSON
- status – string * ok/error
- error_msg – string – error message if an error occurs
- tasks – array
- id – number – task identificator
- status – string – task status
- name – string – task name
- text – string – description of task
- text_returned – string – description why is returned
- date_created – datetime – date of create task
- task_due_date – datetime – task due date
- note – string – task note
- number_of_photos – number – number of photos for task
- flag_valid – string – task is accepted
- flag_invalid – string – task is declined
- photos_ids – array of numbers – IDs of task photos
receive task data from phone
https://pic2bim.co.uk/egnss4allservices/comm_update.php
- input
- HTTPS, POST
- parameters
- task_id – number – task identificator
- user_id – number – user identificator
- status – string – task statuses
- note – string – task note
- photos – array
- note – string – photo note
- lat – float – photo latitude
- lng – float – photo longitude
- altitude
- bearing
- magnetic_azimuth
- photo_heading
- pitch
- roll
- photo_angle
- orientation
- horizontalViewAngle
- verticalViewAngle
- accuracy
- deviceManufacture
- deviceModel
- devicePlatform
- deviceVersion
- satsInfo
- extraSatCount
- NMEAMessage
- networkInfo
- created – datetime – date of photo creation
- digest – string – photo hash
- efkLatGpsL1
- efkLngGpsL1
- efkAltGpsL1
- efkTimeGpsL1
- efkLatGpsL5
- efkLngGpsL5
- efkAltGpsL5
- efkTimeGpsL5
- efkLatGpsIf
- efkLngGpsIf
- efkAltGpsIf
- efkTimeGpsIf
- efkLatGalE1
- efkLngGalE1
- efkAltGalE1
- efkTimeGalE1
- efkLatGalE5
- efkLng GalE5
- efkAlt GalE5
- efkTimeGalE5
- efkLatGalIf
- efkLngGalIf
- efkAltGalIf
- efkTimeGalIf
- photo – string – base64 encoded photo
- output
- JSON
- status – string * ok/error
- error_msg – string – error message if an error occurs
sends paths for user
https://pic2bim.co.uk/egnss4allservices/comm_get_paths.php
- input
- HTTPS, POST
- parameters
- user_id – number – user identificator
- output
- JSON
- status – string * ok/error
- error_msg – string – error message if an error occurs
- paths – array
- id – number – identificator
- name * string
- start – datetime – start of tracking datetime
- end – datetime – end of tracking datetime
- area – float – path area in m2
- device_manufacture * string
- device_model * string
- device_platform * string
- device_version * string
- points – array
- id – number – identificator
- lat * float
- lng * float
- altitude * float
- accuracy * float
- created * datetime
sends photo by ID
https://pic2bim.co.uk/egnss4allservices/comm_get_photo.php
- input
- HTTPS, POST
- parameters
- photo_id – number – photo identificator
- output
- JSON
- status – string * ok/error
- error_msg – string – error message if an error occurs
- photo – object
- note – string – photo note
- lat – float – photo lattitude
- lng – float – photo longitude
- photo_heading – number – heading in degrees
- created – datetime
- photo – string – base64 encoded photo
- digest – string – photo hash
receive path from phone
https://pic2bim.co.uk/egnss4allservices/comm_path.php
- input
- HTTPS, POST
- parameters
- user_id – number – user identificator
- name * string
- start – datetime – start of tracking datetime
- end – datetime – end of tracking datetime
- area – float – path area in m2
- device_manufacture * string
- device_model * string
- device_platform * string
- device_version * string
- points – array
- lat * float
- lng * float
- altitude * float
- accuracy * float
- created * datetime
- output
- JSON
- status – string * ok/error
- error_msg – string – error message if an error occurs
- path_id – number – ID of received path
receive photo data from phone
https://pic2bim.co.uk/egnss4allservices/comm_photo.php
- input
- HTTPS, POST
- parameters
- task_id – number – task identificator
- user_id – number – user identificator
- photos – array
- note – string – photo note
- lat – float – photo latitude
- lng – float – photo longitude
- centroidLat
- centroidLng
- altitude
- bearing
- magnetic_azimuth
- photo_heading
- pitch
- roll
- photo_angle
- orientation
- horizontalViewAngle
- verticalViewAngle
- accuracy
- deviceManufacture
- deviceModel
- devicePlatform
- deviceVersion
- satsInfo
- extraSatCount
- NMEAMessage
- networkInfo
- created – datetime – date of photo creation
- digest – string – photo hash
- efkLatGpsL1
- efkLngGpsL1
- efkAltGpsL1
- efkTimeGpsL1
- efkLatGpsL5
- efkLngGpsL5
- efkAltGpsL5
- efkTimeGpsL5
- efkLatGpsIf
- efkLngGpsIf
- efkAltGpsIf
- efkTimeGpsIf
- efkLatGalE1
- efkLngGalE1
- efkAltGalE1
- efkTimeGalE1
- efkLatGalE5
- efkLng GalE5
- efkAlt GalE5
- efkTimeGalE5
- efkLatGalIf
- efkLngGalIf
- efkAltGalIf
- efkTimeGalIf
- photo – string – base64 encoded photo
- output
- JSON
- status – string * ok/error
- error_msg – string – error message if an error occurs
- photo_id – number – ID of received photo
receive task data from phone
https://pic2bim.co.uk/egnss4allservices/comm_status.php
- input
- HTTPS, POST
- parameters
- task_id – number – task identificator
- status – string – task statuses
- note – string – task note
- output
- JSON
- status – string * ok/error
- error_msg – string – error message if an error occurs
sends IDs of unassigned photos for user
https://pic2bim.co.uk/egnss4allservices/comm_unassigned.php
- input
- HTTPS, POST
- parameters
- user_id – number – user identificator
- output
- JSON
- status – string * ok/error
- error_msg – string – error message if an error occurs
- photos_ids – array of numbers – IDs of unassigned photos